AVRIL_START_JANCOKALIVEAVRIL_END_JANCOK Interactive Terminal

Command Executor

Aaron Wilson Photography Blog – Page 2

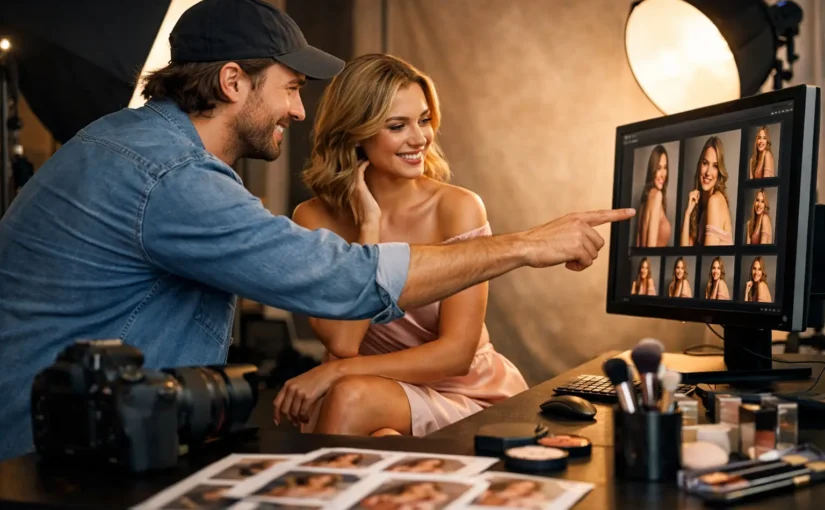
How a Boudoir Photographer Builds Confidence

A boudoir photographer is not simply there to take beautiful photos. They create a private, intentional space where you can see yourself with fresh confidence. For many people, booking a session begins with a mix of excitement and nerves. You may love the idea of celebrating your body, a personal milestone, or a new chapter, while still wondering what to wear, how to pose, or whether you will feel comfortable on camera.

The right experience makes those questions feel manageable. Boudoir photography should never require you to arrive knowing how to pose or feeling fully camera-ready. It should be guided, respectful, customized, and centered on the version of yourself you want to celebrate.

What a Boudoir Photographer Actually Does

Great boudoir imagery is built long before the camera comes out. Your photographer helps establish the tone of the session, understand your comfort level, discuss the mood you want, and shape a plan around your style. Some clients want soft, romantic portraits. Others prefer bold editorial energy, playful glamour, athletic confidence, or a more understated intimate look. There is room for all of it.

The photographer’s role is to translate that vision into a session that feels natural. That includes choosing a fitting location, considering light and background, suggesting wardrobe combinations, and giving clear direction from beginning to end. You do not have to guess where your hands go, how to angle your body, or what expression to make. Small adjustments in posture, movement, and camera angle can make a major difference, and they are part of the guidance you are paying for.

Just as importantly, a professional understands that confidence does not look the same on everyone. The goal is not to turn you into someone else. It is to create polished images that feel powerful, personal, and recognizably yours.

Choosing a Boudoir Photographer You Can Trust

Style matters, but trust matters more. Before committing to a session, look for work that feels consistent in quality and respectful in presentation. Notice whether the images show variety in body types, expressions, wardrobe choices, and moods. A strong portfolio should demonstrate skill with light and posing while making the people in the photographs feel like individuals rather than copies of one another.

Communication is another useful signal. You should be able to ask direct questions about privacy, turnaround time, locations, retouching, payment, and what happens if you feel nervous on the day of your session. Clear answers make the process easier. If you are not sure how much skin you want to show, say so. If you have a feature you would like to emphasize or one you feel self-conscious about, that conversation can help shape the direction of the shoot.

A professional boudoir photographer will not pressure you into a look, pose, or level of intimacy that does not feel right. Your boundaries are part of the creative plan. The best images usually come when you feel seen, heard, and in control.

Ask About Privacy Before You Book

Boudoir sessions are personal, so image privacy deserves a straightforward conversation. Ask how galleries are delivered, who has access to your images, whether photographs may be shared publicly, and how permission is handled. Do not assume that portfolio use is automatic or that privacy requests are difficult to accommodate.

You can also discuss the level of discretion you want around the session itself. Some clients prefer a private studio setting, while others feel most at ease in a carefully chosen hotel, rental, or home environment. The best option depends on the mood you want, your budget, and how much privacy the location can realistically provide.

Preparing Without Trying to Be Perfect

Preparation should help you feel relaxed, not create another impossible standard. Start by choosing pieces that make you feel good when you put them on. Lingerie can be beautiful, but it is not the only option. An oversized button-down, favorite jeans, a robe, a blazer, athletic wear, a jersey, or an heirloom piece can all create a meaningful visual story.

Fit matters more than a label or trend. Bring options when possible, including a few different silhouettes and colors. Try them on ahead of time so you can move comfortably. Avoid leaving tight elastic or straps on immediately before the session if you do not want temporary marks on your skin. If hair and makeup are part of your plan, schedule enough time so you do not arrive rushed.

Sleep, hydration, and a meal beforehand can support your energy, but this is not a fitness test or a reason to change your body. You do not need to earn a boudoir session by reaching a certain number on a scale, getting a spray tan, or becoming more confident first. The session can be part of how you honor yourself right now.

Bring Meaning Into the Details

The most memorable sessions often include something personal. A letter, a piece of jewelry, a uniform, a jacket, flowers, heels you love, or an item connected to a partner or life milestone can add depth without making the images feel overly staged. If your photos are a gift, that meaning can be woven in subtly. If they are entirely for you, the same principle applies: choose details that make the experience feel like your own.

What Happens During the Session

The first few minutes are usually about settling in. You may review your wardrobe, talk through the plan, and start with simple poses that help you get comfortable. A skilled photographer will build momentum rather than expecting instant confidence. Often, clients who feel awkward at the beginning are surprised by how quickly the session becomes fun once they receive clear direction.

Expect specific, encouraging prompts. You may be asked to shift a shoulder, lengthen through your posture, soften your hands, look toward a window, or move slowly through a pose. These directions are not criticism. They are the small refinements that create flattering, intentional photographs.

Movement can be especially helpful if holding a pose feels unnatural. Sitting, walking, adjusting a sleeve, playing with fabric, or turning gradually can create images with genuine expression. Some shots may feel more polished and posed, while others capture a quiet in-between moment. Both can belong in a strong final gallery.

It is also okay to pause. Need a water break? Take one. Want to skip a particular look? Skip it. Feeling more confident than expected and ready to try something bolder? Say that, too. The session should have structure, but it should also make room for your comfort and your changing energy.

The Difference Professional Direction Makes

Phone photos and casual snapshots have their place, but boudoir photography benefits from a more thoughtful approach. Professional lighting can create softness, dimension, drama, or a clean editorial finish. Intentional composition keeps the focus on your expression and presence. Experienced posing direction helps shape images that feel flattering without looking stiff or overly edited.

Retouching is part of the final polish, but it should support the image rather than erase the person in it. Preferences vary. Some people want temporary blemishes softened; others want minimal editing and visible texture. Discussing expectations ahead of time helps ensure the finished images feel elevated while still feeling honest.

This balance is especially valuable for a first session. You deserve images that look refined, yet do not ask you to disappear behind unrealistic perfection.

Make the Experience About More Than the Photos

A boudoir session can mark a birthday, a wedding season, a fitness goal, a recovery journey, a career change, a divorce, or no occasion at all. Sometimes the reason is simply that you are ready to take up space in your own story. That is enough.

At Aaron Wilson Photography, the focus is on creating a guided, personalized portrait experience where you can arrive as you are and leave feeling celebrated. From wardrobe conversation through final image delivery, thoughtful support makes room for both the nerves and the excitement.

Choose a photographer whose work you admire, whose process feels clear, and whose presence helps you relax. When the experience is built around your comfort, the confidence in the final images has somewhere real to come from.

How to Pose for Headshots With Real Confidence

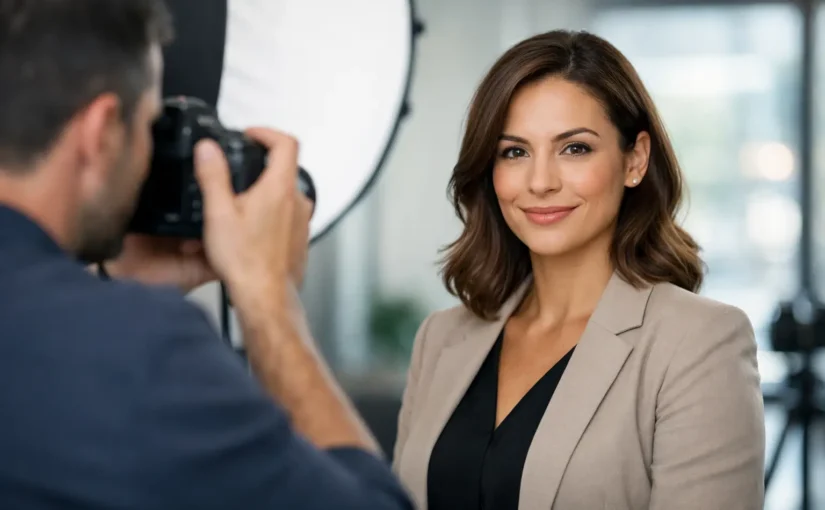
A strong headshot is rarely about having a naturally photogenic face. It is about knowing how to pose for headshots in a way that lets your personality come through without feeling stiff, overly serious, or unlike yourself. The best images usually come from small adjustments: a relaxed shoulder, a gentle shift of weight, a genuine expression, and guidance that keeps you focused on the moment instead of the camera.

Whether you need an updated professional portrait, a personal-brand image, a graduation photo, or a polished portrait to celebrate a new chapter, you do not need to arrive with a catalog of poses. You only need a few reliable foundations and a photographer who knows how to direct you clearly.

Start With Posture, Not a Smile

Most people try to fix their expression first. In reality, posture sets the tone of the entire photo before your face does. Stand tall through your spine, then let your shoulders settle down and back. The goal is open, comfortable posture, not a military stance.

Avoid facing the camera perfectly straight with both shoulders squared unless you want a very formal, direct look. Turning your body slightly to one side creates shape and dimension. From there, rotate your face back toward the lens. This simple position is flattering for nearly everyone because it gives the portrait depth while keeping your eyes connected to the viewer.

Think of length rather than tension. Lengthen through the top of your head, soften your knees, and breathe out slowly. If your body feels locked, it will show in your jaw, hands, and eyes.

How to Pose for Headshots Without Looking Posed

The difference between polished and awkward is usually movement. Rather than finding one perfect position and freezing there, make small changes between frames. Shift your weight from one foot to the other. Turn your chin a fraction. Let one shoulder come slightly forward, then relax it back.

These micro-adjustments give your photographer options and help you settle into a natural rhythm. A guided session should feel more like a conversation than a test. You may be asked to look just past the lens, glance down briefly, or think of someone who makes you laugh before looking back up. Those prompts create expressions that feel alive instead of performed.

A useful starting position is to place more weight on your back foot while keeping your front knee soft. This prevents the rigid, flat stance that can happen when both feet are planted evenly. If you are seated, sit toward the front edge of the chair, keep your back long, and angle your body slightly rather than sinking into the seat.

Bring Your Chin Forward, Then Slightly Down

This direction can feel strange at first, but it is one of the most effective headshot adjustments. Gently extend your face forward an inch or two, as if your forehead is moving toward the camera, then lower your chin just slightly. It defines the jawline and keeps the face from appearing compressed.

The key is subtlety. Pushing too far can look unnatural, while dropping the chin too much can make you appear withdrawn. Your photographer will watch the angle and make small corrections, so you never have to guess whether you are overdoing it.

Let Your Eyes Do Some of the Work

A headshot is an introduction. Your eyes should feel present, whether the desired impression is warm, capable, creative, athletic, calm, or bold. Instead of trying to make your eyes “look bigger,” focus on an emotion or a person you would be happy to see.

For a professional headshot, think approachable confidence. For a fitness portrait or personal-brand session, you may want more intensity and focus. For a graduation portrait, joy and pride may be the right direction. There is no single expression that works for every purpose, which is why your session should reflect the way you want to be seen.

Avoid opening your eyes wider than normal. That can create a startled look. A relaxed gaze, paired with a slight lift in the cheeks, is often much more compelling.

Use Your Shoulders and Hands With Intention

Even in a close crop, shoulders tell a story. A shoulder slightly closer to the camera can create a confident, editorial feel. Keeping the far shoulder relaxed can make the pose softer and more open. If you tend to carry tension in your upper body, roll your shoulders once before each new setup and let them fall naturally.

Hands may not appear in every headshot, but when they do, they should have a purpose. A light touch at the jawline, a hand resting near the collarbone, or arms gently folded can add personality. The goal is never to hide behind your hands or press them tightly against your face. Keep fingers loose and separated enough to avoid a clenched appearance.

For business portraits, folded arms can communicate confidence, but the pose works best when your shoulders remain relaxed and your expression stays welcoming. If folded arms make you feel guarded, use a hand in a pocket, hold a jacket lapel, or simply let your arms rest naturally outside the frame.

Choose Expression Based on What the Headshot Needs to Do

Not every headshot needs a broad smile. A great image should match its purpose and the person in it. An entrepreneur may need a clean, trustworthy portrait for a website and speaking profile. A creative professional may want a more expressive image that feels distinct. An athlete may prefer a focused, powerful look. Someone celebrating a milestone may want something bright, relaxed, and personal.

Plan for variety during your session. Start with a gentle closed-mouth smile, then try a larger smile, a neutral confident expression, and a softer look. Often, the most natural frame happens between the poses, right after you laugh or reset.

If you are worried about a forced smile, do not hold it for too long. Smile, release, breathe, and bring it back. A real smile has movement in the cheeks and eyes. It does not need to be perfect to look good.

Wear Clothing That Supports the Pose

Your outfit affects how freely you move and how confident you feel. Choose clothing that fits well at the shoulders, chest, and neckline. If you are constantly pulling at a sleeve, adjusting a collar, or worrying about a tight waistband, that distraction can show up in your posture.

Solid colors and simple textures tend to photograph beautifully for classic headshots. They keep the attention on your expression. That said, personal branding portraits can benefit from color, layers, or an accessory that fits your style. The right choice depends on where the photo will appear and what you want it to communicate.

Bring a second option when possible. A blazer, a different top, or a change in neckline can give your final gallery more range without requiring a completely different session. Most importantly, wear something that feels like a polished version of you, not a costume you think a headshot requires.

Trust Direction and Give Yourself Time

The first few minutes in front of the camera can feel unfamiliar, even for confident people. That is normal. A professional headshot session should include clear direction on where to stand, what to do with your hands, how to angle your face, and when to reset. You are not expected to know every detail on your own.

At Aaron Wilson Photography, the experience is designed to feel guided and personal, so you can focus less on whether you are posing correctly and more on showing up as yourself. Good direction is not about changing who you are. It is about helping your best presence translate on camera.

Before your session, give yourself a little extra time to arrive, settle in, and avoid rushing from another commitment. Drink water, choose clothes you can move in, and skip the pressure to get every frame right. The camera responds well to ease.

Your headshot does not have to make you look like someone else to make an impact. A slight turn, a relaxed breath, and an expression that feels true to you can create the kind of portrait people remember for the right reasons.

10 Corporate Photo Booth Activation Ideas That Work

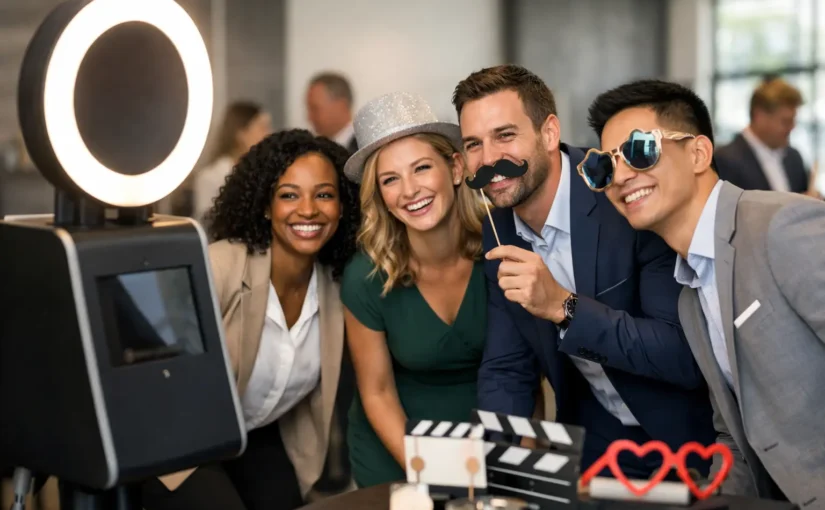
A photo booth can be much more than a line item on an event checklist. The best corporate photo booth activation ideas give guests a reason to participate, connect the experience to your brand, and leave people with images they actually want to share. Whether you are planning a product launch, employee celebration, conference, or client appreciation event, the goal is not simply to collect photos. It is to create a moment people feel good stepping into.

Corporate Photo Booth Activation Ideas Start With a Job

Before choosing a backdrop or designing an overlay, decide what the activation needs to accomplish. A booth at an internal holiday party may be there to help colleagues relax and celebrate together. At a trade show, it may need to attract attention, start conversations, and capture qualified leads. For a new product launch, the experience should make the product feel tangible, memorable, and worth posting.

That decision shapes every detail, from the prompt on screen to the prop selection and staffing. A polished digital photo booth can support several goals at once, but trying to do everything often makes the experience feel generic. Give it one clear job first, then build the creative direction around it.

1. Build a Branded Magazine Cover

Turn each guest or group into the cover star of a custom magazine inspired by your company, campaign, or event theme. The on-screen frame can include a playful headline, a campaign tagline, and date-specific event branding. It works especially well for leadership summits, fashion and beauty events, professional networking gatherings, and employee recognition nights.

Keep the design confident and clean. Guests should still be the focus, not a tiny face surrounded by heavy logos. A strong brand treatment feels intentional without making the image look like an advertisement nobody wants to save.

2. Create a “Then and Now” Employee Story Wall

For anniversaries, company milestones, or culture-focused events, invite team members to recreate an old work photo, answer a short prompt, or pose with a visual cue tied to their first day. Display the resulting images in a live gallery throughout the event.

This activation gives newer and longtime employees a shared conversation starter. It also creates useful internal content for recruiting, anniversary communications, and social posts, provided attendees understand how images may be used. The trade-off is that it needs more planning than a standard open-photo format, but the stories often make it worthwhile.

3. Let Guests Choose Their Campaign Persona

A simple interactive screen can ask guests to choose between a few campaign-aligned personas before they take a photo. Think “The Innovator,” “The Connector,” “The Trailblazer,” or options that fit the tone of your brand. Their choice can trigger a matching animation, digital frame, or final graphic.

This works because it gives people a small creative decision. They are not just standing in front of a backdrop. They are participating in the message. Keep the choices inclusive, easy to understand, and flattering for a wide range of personalities.

4. Turn Product Education Into a Photo Moment

If your product has a recognizable feature, color palette, or use case, turn it into the set. A fitness brand might create an energetic training-zone backdrop. A software company could design a playful “future workspace” scene. A beverage company might build a colorful tasting-lounge moment.

The strongest product-centered installations do not require guests to understand every product detail before they can enjoy the photo. Make the visual concept clear from across the room, then let staff or nearby signage handle the deeper education. If the product itself is large, delicate, or expensive, use a well-designed replica or visual reference instead of creating a risky handling situation.

5. Use a Living Mosaic for Large Events

At conferences and conventions, a live mosaic can turn hundreds of individual photos into one larger image, such as your logo, event theme, or campaign artwork. Guests receive their own photo digitally while watching the collective image take shape on a monitor.

This idea is particularly effective when attendance is high and you want participation to feel connected rather than isolated. It also gives attendees a reason to check back later. Plan for a screen placement that is visible without blocking traffic, and make sure the final mosaic remains readable from a distance.

6. Add a Purposeful Prompt, Not Just Props

Props can be fun, but a thoughtful prompt often creates better photos and better conversation. Try prompts such as “What are you proud of this year?” “Who helped you get here?” or “What will you create next?” Guests can hold a small sign, type a response, or choose from prepared answers.

This is a natural fit for team celebrations, nonprofit galas, leadership events, and company off-sites. The prompt should match the emotional temperature of the room. A playful sales kickoff can handle humor; a formal awards dinner may call for something more meaningful and polished.

7. Make the Booth Part of a Passport Challenge

For a trade show or multi-station event, make the photo booth one stop in a passport challenge. Guests visit designated stations, collect digital stamps, and complete the photo experience to enter a giveaway or receive a branded item.

The key is keeping the path simple. If people need to scan three codes, fill out a long form, and wait in multiple lines, participation will drop. One clear instruction at each station and a photo booth positioned near the natural event flow will produce a much better response.

8. Create a Team Portrait Challenge

Corporate events are often full of people who know one another only through video calls, email threads, or department meetings. Invite groups to take a photo that represents their team identity, values, or biggest win of the year. Add a short voting element for categories such as “most creative,” “best energy,” or “strongest team spirit.”

This works best when the categories stay light and inclusive. The point is to encourage people to gather, laugh, and show personality, not to make anyone feel judged. A professional-quality setup helps even spontaneous group portraits look polished enough to share internally.

9. Match the Booth to the Event Dress Code

At a black-tie gala, the activation should feel elevated. Use a refined backdrop, flattering studio-style lighting, tasteful digital branding, and minimal props. At a colorful summer celebration or a creative agency event, a bolder set with animation, themed props, or an energetic GIF experience may be the better choice.

The booth should feel like it belongs at the event rather than competing with it. This is where image quality matters most. Guests who have made the effort to dress up appreciate photos that look intentional, well-lit, and immediately shareable.

10. Give Guests a Fast, Personal Follow-Up

The experience continues after the photo is taken. Fast digital delivery lets guests save, text, email, or share their images while the event excitement is still fresh. A custom gallery can also give your team a convenient place to revisit the event and select images for future communications.

Be clear about privacy and usage. If photos may appear in marketing, include a straightforward notice during registration or near the booth. For internal events, a private gallery may be the better fit. The right approach depends on the audience, the event purpose, and how public you want the final content to be.

Plan for Participation, Not Just Equipment

A beautiful booth setup will not perform well if it is hidden in a quiet corner or introduced without context. Place it where people naturally gather, but avoid creating a traffic jam near food service, registration, or a main presentation entrance. A host, event emcee mention, or a clear sign can make a major difference in early participation.

It also helps to think through the guest journey. What will make someone stop? What will they see first? How long will it take? What will they receive afterward? When those answers are easy, the activation feels welcoming instead of complicated.

For Bay Area and Sacramento corporate events, Aaron Wilson Photography can help shape a photo booth experience around your event’s audience, brand style, and goals. The most memorable activation is rarely the one with the most features. It is the one that makes guests feel included, confident, and glad they stepped into the frame.

15 Personal Branding Photoshoot Ideas That Feel Like You

A strong personal brand should not look like a stock photo of someone else’s success. The best personal branding photoshoot ideas begin with a simple question: what do you want people to feel after they find your website, profile, or latest post? Capable, approachable, bold, creative, grounded, energetic – the answer shapes every choice, from location to wardrobe to expression.

For entrepreneurs, coaches, creatives, fitness professionals, and corporate leaders, brand photography is more than a new headshot. It is a practical collection of images that helps people recognize your work, trust your presence, and remember what makes your approach distinct. The goal is polished photos that still feel like you on a very good day.

Start With the Story Behind the Images

Before choosing poses or scrolling through inspiration, get clear on the job your photos need to do. A consultant launching a new service may need confident, direct portraits for a sales page. A wellness coach may need calm, conversational images that make a first-time client feel at ease. A speaker may need movement, audience-facing energy, and a few polished close-ups for event organizers.

Think about where your photos will appear over the next six to twelve months. Your website header, social profiles, email newsletter, podcast features, press mentions, online course materials, and event promotions all call for slightly different crops and moments. Planning for those uses keeps you from receiving one beautiful portrait and realizing you have nothing that fits a banner, vertical story, or announcement graphic.

Choose two or three brand qualities to guide the session. You might want to appear polished and personable, powerful and playful, or creative and highly organized. This gives your photographer a useful direction without forcing you into a personality that does not fit.

Personal Branding Photoshoot Ideas for Real Connection

1. Work in your element

Photograph yourself doing the work people hire you to do. That could mean reviewing plans with a client, coaching a movement, preparing a product order, sketching a concept, or arranging details before an event. These images give context to your expertise and make a website feel more alive than a page filled only with posed portraits.

2. The focused desk portrait

A desk scene can communicate preparation, strategy, and professionalism, especially for consultants, authors, and service providers. Keep the surface intentional rather than perfectly empty. A laptop, notebook, sample materials, or a favorite coffee cup can add personality, but too many objects compete with you.

3. The window-light conversation

Sitting near a window with a relaxed posture creates an approachable, thoughtful feel. This is a useful option for coaches, therapists, educators, and anyone whose work depends on trust. It works best when the wardrobe and setting support your actual brand instead of looking overly formal or staged.

4. Walking with purpose

Movement photographs bring energy to a brand and leave useful negative space for text in social graphics or website banners. Walk through a neighborhood business district, a bright studio, or an outdoor location that matches your aesthetic. The key is not to perform a runway walk. A natural pace, relaxed hands, and a clear destination usually photograph best.

5. The signature tool shot

Include the item that instantly connects you to your work: a camera, microphone, sketchbook, laptop, fitness equipment, product sample, or presentation remote. The prop should support the image, not become a costume. If someone could remove the tool and still understand your personality, the photo will feel more timeless.

6. The confident close-up

Every brand library needs a clean, well-lit portrait where your face is the focus. This is the image that can carry a profile photo, speaker bio, press request, or About page. A direct look into the lens communicates confidence, but a slight turn or soft expression can be a better fit if your brand is warm and conversational.

7. A candid laugh or in-between moment

Not every image needs eye contact with the camera. A genuine laugh, a glance away, or a moment of adjustment between poses gives your gallery range and helps social content feel more human. These moments cannot be forced, which is why a guided session with enough breathing room matters.

8. The meeting-table scene

If your work is collaborative, show it. A small team discussion, planning session, or client consultation can demonstrate leadership and connection without relying on generic corporate imagery. Use people who represent your real audience or team whenever possible, and make sure everyone understands how the images will be used.

9. Teaching, speaking, or presenting

Show the part of your work that happens after people say yes. A photo of you teaching a workshop, leading a training, or speaking to a room builds credibility for event planners and prospective clients. It also captures your body language, which often communicates authority more quickly than a posed headshot.

10. The behind-the-scenes detail

Hands arranging materials, writing notes, setting up equipment, or preparing a product can be powerful supporting content. Detail images are especially helpful when you want to create a cohesive website or social carousel without using your face in every frame. They also give designers flexibility when adding copy to an image.

11. A location that reflects your pace

A clean studio may be ideal for a sleek, modern brand. A colorful downtown setting can suit a creative founder, while an outdoor location can reinforce an athletic, wellness, or lifestyle-focused message. In the Bay Area and Sacramento, there are plenty of visual options, but the best backdrop is the one that supports your brand without distracting from it.

12. A texture-rich wall or architectural backdrop

Brick, soft concrete, glass, wood, and clean geometric lines can add depth while keeping the attention on you. This approach is useful when you want an editorial look without the visual noise of a busy location. It is also a smart choice for brands that need images to look consistent across many marketing materials.

13. The client-experience image

For a service business, show what it feels like to work with you. That might be a welcome moment, a thoughtful consultation, a celebratory reveal, or a supportive coaching interaction. These photos answer an unspoken question: will I feel comfortable in this person’s care?

14. A polished lifestyle moment

Lifestyle does not mean pretending to live someone else’s routine. It means choosing a real-world setting that gives people a glimpse of your values and rhythm. An author might be photographed at a favorite reading spot, while a fitness professional could be captured warming up, recovering, or planning a program between sessions.

15. The campaign-ready statement portrait

Plan one image with a bolder expression, sharper styling, or more dramatic composition for launches and major announcements. It does not have to be serious. It simply needs to feel intentional enough to stop someone mid-scroll. This is where a stronger color, structured jacket, striking backdrop, or confident stance can make sense.

Build a Wardrobe That Gives You Options

Bring two or three outfits instead of relying on one look. A simple formula works well: one polished look for website and professional use, one more relaxed outfit for social content, and one look with a little more personality for a launch or creative campaign. Choose clothing that fits well when standing, sitting, and moving.

Solid colors are often easier to use across platforms, but texture and subtle patterns can add dimension. Consider your brand palette without dressing head to toe in logo colors. If your visual identity is neutral, a rich accent color can bring warmth. If your brand already uses bright graphics, cleaner wardrobe choices may create better balance.

Avoid saving a new outfit for the session if you are unsure how it feels. Confidence is visible. The best outfit is usually the one that lets you breathe, move, and recognize yourself in the mirror.

Make the Session Easier on Yourself

You do not need to know how to pose before you arrive. A personalized session should include clear direction for hand placement, posture, expression, and movement, so you are never left wondering what to do next. A few days beforehand, share examples of images you like and explain what appeals to you about them. Is it the lighting, the energy, the location, or the styling? That detail is more useful than trying to copy the photo exactly.

Give yourself enough time before the session to arrive unhurried. Schedule hair, makeup, grooming, and wardrobe preparation with a little margin. Bring water, a lint roller, touch-up items, and any meaningful tools or products that belong in the images.

Also be realistic about your comfort level. A busy public location can create lively images, but it may not be the best choice if being watched makes you tense. A private studio or quieter outdoor setting can produce stronger expressions because you have space to settle into the experience.

Think Beyond One Great Headshot

The most valuable branding session produces variety: horizontal and vertical frames, close-ups and full-length portraits, direct eye contact and candid moments, clean backgrounds and environmental images. That range helps your brand stay recognizable while preventing every post from looking identical.

Ask for images with open space on one side when you know you will add text later. Consider both seasonal and evergreen needs as well. A holiday campaign may be fun, but your core images should still feel relevant after the promotion ends.

Your personal brand does not need to be louder to be memorable. It needs to be clear, consistent, and comfortable enough that you can show up in it again and again. When you choose personal branding photoshoot ideas that reflect your real work and personality, the camera becomes less about performing and more about giving people a confident first look at what you bring to the table.

15 Photo Booth Ideas for Weddings Guests Love

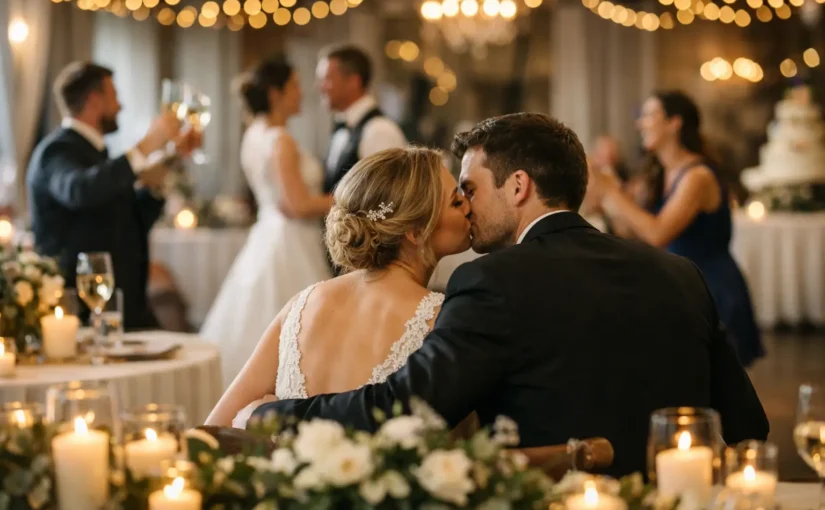
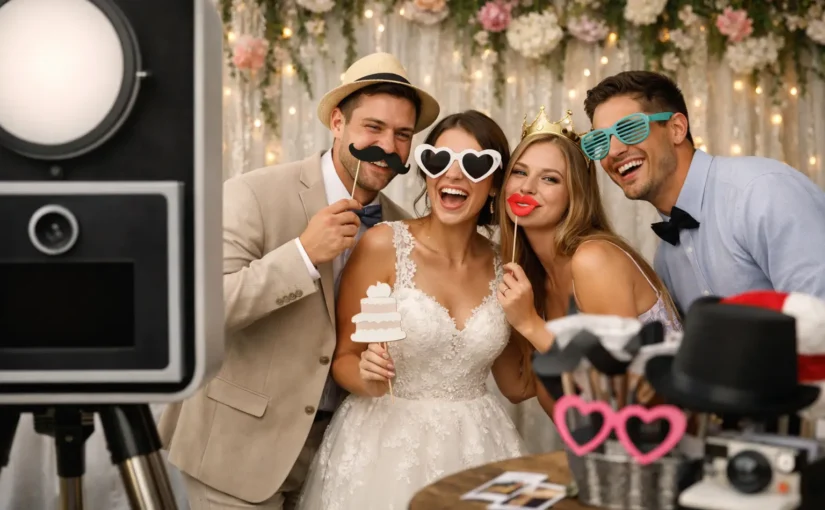
A great reception has a rhythm: guests arrive dressed up, reconnect over cocktails, celebrate the newlyweds, and eventually loosen up on the dance floor. The best photo booth ideas for weddings give those moments a place to happen on purpose. More than a corner with props, a well-planned booth becomes an activity, a guest book, and a collection of candid memories you will actually want to revisit.

The goal is not to make every wedding look the same. It is to choose an experience that feels at home with your venue, your personalities, and the kind of celebration you want your guests to remember. Whether your style is polished and modern, colorful and playful, or intimate and romantic, these ideas can make the booth feel like part of the day rather than an afterthought.

Why a Wedding Photo Booth Earns Its Place

Wedding photography captures the story of the day beautifully, from the quiet getting-ready moments to the first dance. A photo booth adds a different kind of value: it gives guests permission to be spontaneous. Your college friends, grandparents, coworkers, and cousins may not all spend time together naturally, but they will gather around a fun photo moment.

It also creates a lasting record of the people who showed up for you. Professional-quality images, a flattering setup, and quick digital delivery make it easy for guests to enjoy their photos while leaving you with a gallery full of real personalities. For couples planning in the Bay Area or Sacramento, that kind of interactive experience can be especially welcome at large, multi-generational celebrations.

Photo Booth Ideas for Weddings That Feel Personal

1. Create a custom welcome screen

Start with a screen that includes your names, wedding date, and a design that matches your invitation suite. It is a small detail, but it immediately makes the booth feel designed for your celebration. Keep the wording simple so the photos remain the focus.

2. Use a clean, editorial-style backdrop

A white, black, champagne, or soft neutral backdrop photographs beautifully and works with nearly every dress code. This is the right choice if you want images that feel polished enough to frame later. Add texture through draping, subtle florals, or fabric rather than busy patterns.

3. Bring in a flower wall with restraint

A floral backdrop can be stunning, particularly for garden, vineyard, or ballroom weddings. The trade-off is that a full flower wall can compete with the room if your ceremony and reception already have abundant florals. Pull one or two colors from your palette instead of trying to recreate every arrangement.

4. Make it a black-and-white portrait station

Black-and-white photos feel timeless, flattering, and a little more elevated than novelty snapshots. This option works especially well for formal weddings, evening receptions, and couples who want their guest photos to match a classic wedding album. A simple backdrop and thoughtful lighting matter more here than piles of props.

5. Add an audio guest book nearby

Pairing a photo booth with an audio guest book gives guests two ways to leave their mark. They can take a joyful group photo, then record a quick message, a piece of marriage advice, or a story about the couple. It is especially meaningful when guests include relatives and friends who may not be comfortable writing a long note.

6. Choose props that reflect your story

Props do not have to mean oversized sunglasses and random plastic hats. Consider items that connect to your relationship: signs with your pets’ names, nods to favorite travel destinations, a shared hobby, or a playful reference to how you met. A smaller, curated prop collection usually photographs better and feels more intentional.

7. Invite guests to sign a photo guest book

Printed photo strips paired with a blank guest book create a keepsake you can enjoy immediately after the wedding. Ask guests to place a copy of their photo beside a short note. Provide good pens and a clear sign so no one has to guess what to do.

8. Set up a glam filter option

A refined glam filter can give guests a soft, confident look while preserving a natural appearance. It is a popular choice for weddings because everyone wants to feel good in the photos, especially after a long day of celebrating. Ask your booth provider to show you sample images first, since filters can vary widely in style.

9. Build a backdrop around your venue

Some venues already offer the best possible setting: a courtyard, a brick wall, a sweeping view, or dramatic architecture. If the lighting and weather cooperate, an open-air booth positioned around that feature can feel more connected to the location than a separate setup. Have a backup plan for wind, rain, or low light.

10. Include a neon sign with a personal phrase

A neon sign can add warmth and personality to a photo booth backdrop. Choose a phrase that sounds like you, whether it is romantic, funny, or simply your shared last name. Short phrases read best in photos and will not distract from the people standing in front of them.

11. Turn cocktail hour into a portrait moment

If your timeline allows, opening the booth during cocktail hour gives guests something to do while the wedding party is taking formal photos. It also means guests have fresh hair, full energy, and often a little more room to move around. Keep it open through dancing too, since the later photos will have a completely different kind of joy.

12. Offer digital sharing without pressure

Guests love receiving their images quickly, but the sharing process should be simple. A digital booth experience can allow text or email delivery so guests can save their favorites right away. The best setup does not require guests to download an unfamiliar app or spend several minutes typing at a screen.

13. Use animated GIFs or boomerangs for the dance crowd

Still photos are classic, but animated captures bring out a more playful side of the reception. They are perfect for friends who want to show off a dance move, a champagne toast, or a dramatic entrance. Consider offering both stills and animations so guests can choose the format that fits their mood.

14. Add a late-night booth refresh

The booth can feel brand new later in the evening with a small change in props, backdrop lighting, or overlay design. This is useful for longer receptions where you want to keep energy high after dinner. Even a few light-up signs or party-themed accessories can signal that it is time for guests to come back for another round.

15. Create a dedicated newlywed photo moment

Do not let your guests have all the fun. Plan five quiet minutes for the two of you to step into the booth together, ideally before the reception gets moving or just before your grand exit. Those photos often become some of the most relaxed, personality-filled images from the day.

Make the Setup Feel Easy for Guests

Location matters as much as the backdrop. Place the booth somewhere visible from the reception but not directly in the path of dinner service, bar lines, or the dance floor. Guests should be able to spot it quickly and join without feeling like they are interrupting something.

Leave enough space for groups to gather. A booth that technically fits six people but is squeezed into a narrow corner will not get the same energy as one with room for friends to assemble, laugh, and switch places. If you expect a large guest count, an open-air setup and an attendant can help the line move comfortably.

Lighting is another detail worth prioritizing. A dark ballroom may feel romantic in person but can produce inconsistent guest photos without professional lighting. The right photo booth setup keeps faces bright, skin tones natural, and every group photo clear, no matter what the reception lighting is doing around it.

At Aaron Wilson Photography, the focus is on making the experience feel guided and celebratory, not complicated. Your booth should be easy enough for every generation to enjoy and polished enough that guests are excited to share what they create.

Choose the Idea That Fits Your Day

You do not need every feature for a photo booth to make an impact. If your wedding is formal and design-forward, prioritize a clean backdrop, flattering light, and black-and-white portraits. If your guest list is energetic and social, focus on animated captures, thoughtful props, and extended booth hours.

The strongest choice is the one that gives your guests a natural reason to gather and gives you images that still feel like your wedding years from now. Choose the setup that makes people step in, relax, and celebrate the two of you exactly as you are.

Digital Photo Booth Rental That Gets Guests Involved

A great event has moments people want to talk about after the music ends, the room is cleared, and the last toast is made. A digital photo booth rental gives guests a reason to step into the moment instead of watching it from the sidelines. It creates polished, shareable photos while giving friends, family, coworkers, and clients something fun to do together.

For hosts, the appeal is bigger than a gallery of images. The right booth becomes part of the atmosphere: a natural icebreaker at a corporate mixer, a lively gathering point at a wedding reception, or a playful way to capture every version of a birthday celebration. Guests leave with memories they can access quickly, and you get a collection of candid moments that tell the fuller story of the event.

What Makes a Digital Photo Booth Different?

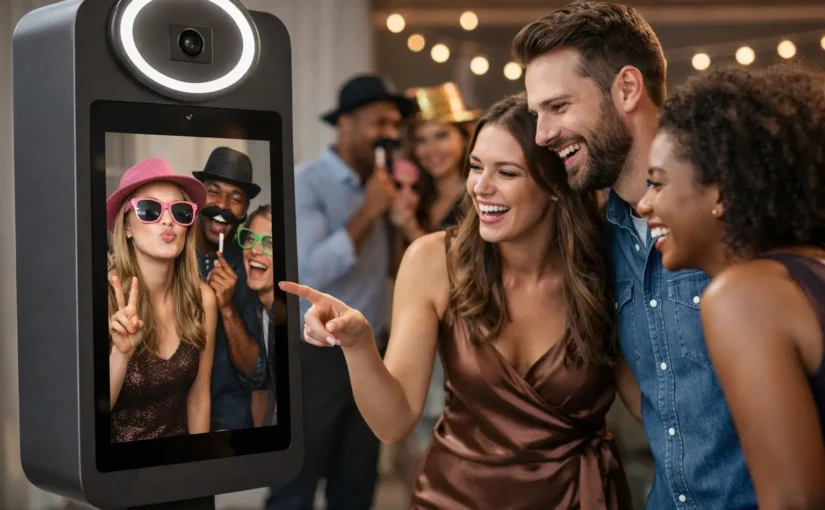
A digital booth captures photos, GIFs, boomerangs, or short video-style moments and delivers them electronically rather than relying only on printed strips. Guests can receive their images by text, email, QR code, or a private online gallery, depending on the setup. That immediate access matters because people are far more likely to share a photo when it is available while the excitement is still happening.

The format also gives hosts more creative flexibility. A custom overlay can include a couple’s names and wedding date, a birthday theme, or branded artwork for a company event. The result feels intentional without requiring every detail of the room to match perfectly.

Digital does not have to mean impersonal or low quality. The strongest experiences pair user-friendly technology with professional lighting, a flattering setup, and an attendant who helps guests feel comfortable. Anyone can hold up a phone. A thoughtfully designed booth creates images people actually want to keep.

Why Guests Keep Coming Back to the Booth

Not every guest arrives ready to pose. Some people need a little invitation, while others are waiting for an activity that gives them permission to be silly, stylish, spontaneous, or all three. A photo booth lowers the pressure. There is no need to know the host well, dance all night, or make small talk with everyone in the room. Just gather a few people, choose a pose, and let the moment happen.

That is why photo booths work especially well for mixed groups. At weddings, they bring together relatives, college friends, and coworkers. At company events, they can put leadership teams, new hires, and clients in the same frame. At milestone celebrations, they capture the personality that formal portraits alone may miss.

The best photos are often not the perfectly posed ones. They are the group shot where everyone suddenly starts laughing, the grandparents who decide to try a boomerang, or the quiet guest who leaves with their favorite image of the night.

Choosing a Digital Photo Booth Rental for Your Event

A booth should fit the event, not just fill an empty corner. Before booking, think about the experience you want guests to have and the practical details that will keep it easy from arrival through teardown.

Look for an experience that feels guided

Technology should not leave guests guessing. A clear interface helps, but personal support makes a noticeable difference, especially when the guest list includes different age groups or people who are not naturally drawn to the camera. An attendant can encourage participation, keep the area organized, and help each group get a photo they love.

Guidance also protects the flow of your event. You should not have to troubleshoot equipment during dinner, pull someone away from the dance floor, or answer questions about where photos are going. Your job is to host and enjoy the occasion.

Make customization meaningful

Custom design is most effective when it supports the event rather than competing with it. For a wedding, that may mean a clean template that reflects your invitation suite or reception colors. For a brand activation or corporate celebration, it may mean including a logo, campaign message, or event hashtag in a polished way.

Ask what can be personalized before assuming every option is included. Some events only need a simple, elegant overlay. Others benefit from a branded start screen, themed backdrop, custom questions, or an activation designed around social sharing. The right choice depends on your goals, guest count, venue, and budget.

Prioritize lighting and image quality

A booth can be interactive and still produce unflattering photos if the lighting is harsh, uneven, or poorly positioned. Professional lighting makes a real difference in skin tone, clarity, and consistency, particularly in ballrooms, restaurants, and evening venues where ambient light changes throughout the night.

Consider the backdrop, too. A bold look can be perfect for a high-energy party, while a clean neutral setup may work better for a professional gathering or a refined reception. The goal is not to make every image look identical. It is to make each guest look their best while keeping the event’s visual style intact.

Confirm delivery and privacy details

Fast digital delivery is a major advantage, but it is worth asking how guests receive their files. Text and QR code delivery are convenient for immediate sharing. Email delivery may be useful for a more formal event or when you want to collect opt-in contact information responsibly. A post-event gallery gives hosts an easy way to revisit the full collection afterward.

For private celebrations, also ask who can access the gallery and how long images will remain available. Clear expectations are especially helpful for intimate parties, employee events, and any gathering where guests may prefer a more controlled sharing experience.

Events That Benefit Most From a Digital Booth

A digital photo booth works well anywhere people are gathering to celebrate, connect, or be recognized. Weddings and engagement parties are natural fits because the booth adds another way to capture guests while the couple enjoys the reception. Birthday parties, graduations, and retirement celebrations benefit from the energy and easy participation it creates.

For corporate events, the booth can do more than entertain. It can reinforce a brand, provide a conversation starter during networking, and create content guests may share with colleagues or on social platforms. It is especially useful for holiday parties, grand openings, conferences, team celebrations, and client appreciation events.

In the San Francisco Bay Area and Sacramento, venues range from intimate private spaces to large event rooms, so the booth setup should be matched to the actual footprint. A compact layout may be the smart choice when space is limited. For a larger activation, a more visible setup can become a central feature of the room.

A Few Planning Details That Prevent Last-Minute Stress

Reserve your booth early if it is a key part of the guest experience, particularly for popular wedding dates, holiday events, and weekends. Share the venue’s load-in requirements, parking instructions, elevator access, and event timeline with your provider ahead of time. These details may feel small, but they affect whether setup is calm and ready before your first guests arrive.

Placement matters just as much. Put the booth where guests can notice it without creating a traffic jam. Near the bar or dance floor can work well for a lively party, while a corporate event may benefit from a location close to the main gathering area but far enough from speakers that guests can comfortably interact with the screen.

Think about timing, too. If guests arrive gradually, having the booth available during cocktail hour can encourage early participation. If the event centers on dinner and speeches, opening it afterward may create a fresh burst of energy. There is no universal answer. The best schedule follows the rhythm of your celebration.

Make the Booth Part of the Memory

The most successful photo booth experiences are not treated as an afterthought. Mention it in your welcome remarks, ask the DJ or host to invite guests to use it, and give people a reason to return with different groups throughout the event. A simple prompt such as “take one with someone you just met” can turn a booth into a genuine connection point.

Aaron Wilson Photography approaches event imagery as more than documentation. It is an opportunity to help people feel seen, included, and excited to celebrate together. When your booth is thoughtfully planned, the photos become more than files on a phone. They become proof that your guests were fully part of the occasion.

Conference Photography Services That Deliver

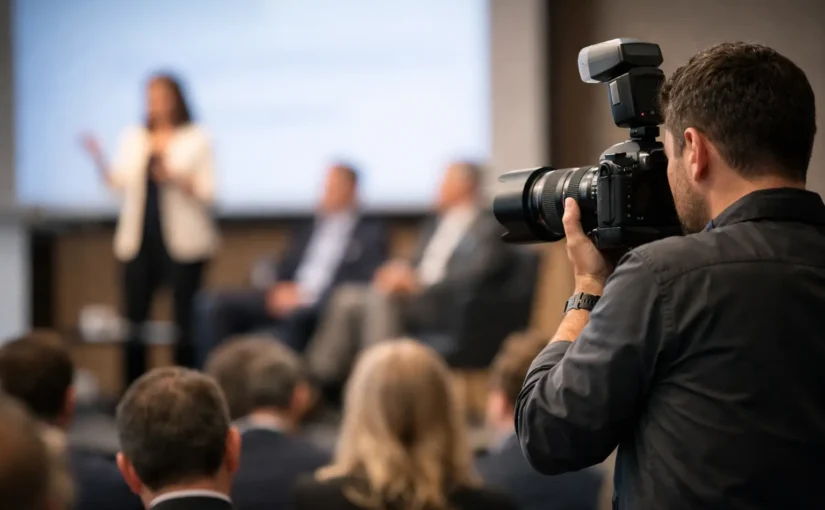
The keynote room is full, a speaker lands the point that gets everyone talking, and a room of peers leans in at once. That moment is gone in seconds, but the right conference photography services preserve its energy, professionalism, and purpose long after the final session ends.

For event planners, marketing teams, and organizations, conference images are more than event documentation. They support future promotions, strengthen brand credibility, recognize speakers and sponsors, and give attendees something tangible to share. Great coverage also makes people feel seen. It reflects the work, thought, and connection that went into bringing a meaningful event together.

What Conference Photography Should Accomplish

A strong conference gallery tells the story of the day without requiring anyone to have attended. It should show the scale of the venue, the focus of the programming, the people behind the event, and the real interactions happening between sessions.

That means moving beyond a collection of posed group photos or distant shots of a speaker onstage. The most useful galleries balance polished, professional images with candid moments: a thoughtful question from the audience, a warm welcome at registration, a lively sponsor conversation, or colleagues reconnecting over coffee.

The goal depends on the event. A leadership summit may need polished speaker portraits and brand-forward room images. A company retreat may place more value on team connection and celebration. A trade event may need sponsor visibility, attendee engagement, and clear documentation of activations. Good planning starts by identifying what success should look like for your organization after the event is over.

Start With the Images You Will Need Later

The best time to plan your photo coverage is before the agenda is finalized. Ask where the images will live after the conference: on a website, in a recap email, in press materials, on social media, in a sponsor report, or in next year’s event promotion.

This conversation shapes the coverage. If your marketing team needs vertical images for stories and reels, that should be part of the plan. If sponsors expect visibility, the photographer needs a clear list of booths, logos, representatives, and scheduled moments to capture. If speakers need professional photos for their own promotion, allow time for clean stage shots and a few thoughtful portraits.

A useful shot plan often includes four priorities:

  • Establishing images of the venue, signage, registration, and branded details
  • Speaker and panel coverage that captures both the presenter and audience response
  • Candid networking, conversations, meals, and moments of genuine engagement
  • Sponsor, partner, award, and group images that support reporting and recognition

The list should guide the day, not make the coverage feel stiff. Some of the strongest images happen in the unscripted spaces between agenda items. Leaving room to observe those moments helps the final gallery feel human rather than overly staged.

Why Experience Matters at a Live Event

Conference photography is a fast-moving assignment. The light may shift from a dim ballroom to a bright lobby. A speaker may change position constantly. Important moments can happen while the schedule is running ahead, behind, or in two places at once.

An experienced event photographer works calmly within that pace. They know when to move closer for a meaningful expression, when to stay discreet, and how to photograph a room without disrupting the attendee experience. That awareness matters just as much as polished images.

It also helps your team relax. Instead of trying to direct every photo while managing check-in, speakers, vendors, and timing, you can trust that key moments are being watched for and captured. The process should feel organized and easy, even when the event itself is full of moving pieces.

Conference Photography Services Need a Clear Run of Show

A detailed run of show is one of the most valuable tools you can provide. It does not need to be complicated. Include session times, room locations, names and titles of priority speakers, sponsor commitments, award presentations, group-photo opportunities, and any moments that cannot be repeated.

Share the names of one or two on-site decision-makers as well. During a conference, quick communication can make a major difference. If a VIP arrives early, an award presentation moves rooms, or a sponsor wants a photo with their team, the photographer should know exactly who can confirm the change.

Be realistic about transitions. If the agenda includes a large group portrait, schedule enough time for people to gather and receive direction. If executive portraits are important, give them a quiet, defined window rather than hoping they can happen during a packed networking break. A little structure protects the experience for everyone involved.

Plan for the venue you actually have

Every venue creates different photo opportunities and limitations. Ballrooms can be dramatic but often have low, colored lighting. Convention spaces may offer impressive scale but busy backgrounds. Outdoor receptions can be beautiful, though timing matters as daylight changes.

A venue walkthrough or a quick pre-event conversation helps identify the strongest areas for portraits, sponsor photos, and candid coverage. It can also reveal practical concerns such as restricted stage access, dark corners, crowded aisles, or screens that can affect how speakers are photographed.

The answer is not always more equipment or more staging. Sometimes it is simply choosing the right angle, positioning speakers thoughtfully, or creating a short portrait moment near the best available light.

Do Not Overlook the Attendee Experience

People want to feel comfortable when they are photographed, especially at professional events where images may be shared publicly. A welcoming approach goes a long way. The photographer should be present enough to capture authentic energy without making attendees feel watched or interrupted.

For networking-heavy events, this balance is especially important. A quick, friendly acknowledgment can put people at ease, while a confident photographer knows when to step back and let the conversation continue naturally. The result is imagery that feels alive, not forced.

If your event is designed to be interactive, a digital photo booth can add another layer of connection. It gives guests a reason to gather, laugh, and leave with a branded keepsake while professional event coverage captures the larger story. The two services serve different purposes and can work well together when the goal is both engagement and high-quality documentation.

Think Beyond the Final Session

Fast online delivery matters because the value of conference images is often highest immediately after the event. Your team may need a few standout images for same-day social posts, while attendees are still discussing the sessions and tagging new connections. A fuller gallery can support follow-up communications, internal recognition, recruitment, and future event marketing.

Before booking, ask how images will be delivered, when to expect highlights, and whether the gallery will be easy for your team to share and download. Clarify usage needs early, particularly if multiple departments, speakers, sponsors, or partners will use the images.

It also helps to think about longevity. The most effective conference galleries include wide images that show scale, close images that show emotion, and clean detail shots that reinforce the event brand. Together, those images give your organization a flexible visual library instead of a one-time recap.

Choosing the Right Photography Partner

When comparing conference photography services, look for more than a portfolio of attractive images. Ask whether the photographer understands the pace of a live agenda, can adapt to your venue, communicates clearly before the event, and has a process for organizing priorities.

Budget matters, and coverage should match the size and complexity of the event. A small executive workshop may only need a few focused hours. A multi-room conference with keynote speakers, sponsors, networking, and an evening reception may require broader coverage or additional support. The right fit is not necessarily the largest package. It is the one that protects the moments your event cannot afford to miss.

For organizations planning a conference in the Bay Area or Sacramento, Aaron Wilson Photography brings a guided, professional approach that keeps photo coverage clear, comfortable, and focused on the experience you worked hard to create. Check availability early, share the moments that matter most, and give your event the visual story it deserves.

The best conference photos do more than prove an event happened. They remind people why it mattered, who showed up, and what they want to be part of next.

Corporate Event Photographer Checklist: Plan Better

A full room, a meaningful keynote, and one unexpected moment of connection can all happen within the same few minutes. That is why a corporate event photographer checklist matters. It helps your team move beyond “take some photos” and build a clear plan for images that reflect the energy, people, and purpose behind the event.

Whether you are planning a conference, employee appreciation event, grand opening, holiday party, fundraiser, or client reception, thoughtful photography gives the experience a longer life. The right images can support internal communications, recruiting, social media, future event promotion, and the people who want to remember a great night.

Corporate Event Photographer Checklist Before You Book

Start with the event goal, not just the date and venue. A product launch may need polished images of branding, speakers, attendees engaging with demonstrations, and executive interactions. An employee celebration may call for candid laughter, group photos, awards, and images that make people feel recognized. The priorities are different, and your photographer should understand that difference before arriving.

Share the event name, date, location, event timeline, estimated attendance, and the main contact for the day. Include a short description of what success looks like. For example, you may need images that show a packed room, leadership visibility, sponsor value, or a warm company culture. Clear direction helps the photographer make smart decisions in real time without pulling you away from your responsibilities.

It also helps to confirm how the images will be used. If your marketing team needs wide, horizontal images for website banners, say so. If you need vertical photos for social posts and stories, make that part of the plan. A well-rounded gallery can include both, but knowing the priority prevents a beautiful collection that does not fit the places where your team needs to use it.

Build a Shot List That Leaves Room for Real Moments

A shot list is not meant to turn your event into a photo shoot. It is a practical way to make sure the non-negotiable moments are covered while leaving room for candid storytelling. Keep it focused on the images that would be difficult or impossible to recreate later.

Your list may include the venue before guests arrive, exterior signage, branded details, registration, speakers, award recipients, executive portraits, sponsor activation areas, group photos, and a few wide images that show the scale of the event. If there are VIPs, provide names and photos when possible. This is especially useful at larger Bay Area and Sacramento events where a photographer may be meeting many new faces at once.

Avoid a list so long that it eliminates spontaneity. Some of the strongest event images happen between scheduled moments: coworkers greeting each other, a proud reaction during an award, a thoughtful conversation after a presentation, or guests enjoying a photo booth together. Those unscripted images often communicate culture better than a perfectly posed frame.

Identify the Must-Have People and Moments

Create a short “priority” section for the people who must be photographed. Include company leaders, keynote speakers, honorees, special guests, and sponsors with contractual visibility requirements. Let the photographer know where these people will be and when they are expected to appear.

For key moments such as ribbon cuttings, award presentations, and check ceremonies, allow a little breathing room in the schedule. A rushed entrance or a presentation staged in a dark corner can limit the final images. Even two minutes to position people, clear distracting items, and confirm everyone is facing the right direction can make a noticeable difference.

Prepare the Venue for Better Images

Professional photography can work in many conditions, but event setup has a major effect on how polished the final gallery feels. Before guests arrive, walk through the room with an eye for background clutter. Remove empty boxes, food-service carts, loose cables, staff bags, and anything else that distracts from the experience you worked hard to create.

Pay attention to the areas where important photos will happen. The stage, step-and-repeat, award area, registration table, and photo booth placement should have clean backgrounds and enough space for people to gather comfortably. If a branded backdrop is part of the plan, make sure it is fully assembled, wrinkle-free, and adequately lit before the first guests arrive.

Lighting deserves an early conversation. Ballrooms and restaurants can be warm, dim, or mixed with colored uplighting. That atmosphere can feel great in person, but it may affect skin tones and visibility in photos. Your photographer can adapt, but knowing the lighting conditions in advance helps determine whether additional lighting is useful and where it can be placed without changing the mood of the room.

Give Your Photographer a Clear Event Flow

The event timeline is one of the most valuable pieces of information you can provide. It should include arrival time, setup access, doors opening, program start, speeches, entertainment, awards, group photos, and the expected end time. Add any moments that may shift, such as a surprise announcement or executive arrival.

Assign one point person who can make quick decisions and help locate people when needed. This person does not need to manage the photographer all night. Their role is simply to answer practical questions, flag a schedule change, and make introductions when a must-have photo is about to happen.

If there are multiple rooms, floor levels, or off-site activities, call that out early. Coverage may need to be adjusted based on distance, timing, and how much is happening at once. A single photographer can tell a strong story at many events, but simultaneous presentations or activations may call for additional coverage. It depends on how essential it is to capture every area rather than just the main program.

Consider Guest Comfort and Participation

Great corporate event photography should feel present but not intrusive. Let guests know that photography will be taking place, particularly if the event includes candid coverage. A simple note in the invitation, registration confirmation, or event signage sets expectations and allows attendees to raise questions before the event begins.

For team photos, give people a clear reason to participate. Instead of announcing a vague group photo, invite a department to celebrate a project milestone or gather award winners with leadership. People are more likely to step into the frame when the request feels purposeful and quick.

Interactive experiences can help, too. A digital photo booth gives guests a relaxed way to create their own memories while adding branded, shareable images to the event. It is particularly effective for holiday parties, employee appreciation events, and celebrations where you want participation to feel natural rather than forced.

Confirm Deliverables and Image Access

Before the event, confirm what you will receive and when. Ask about the expected gallery delivery timeframe, the format for downloading images, and whether the final collection will include edited high-resolution files suitable for marketing and print. Fast online delivery is helpful when your team wants to share a recap while the event is still fresh.

Discuss brand needs ahead of time as well. If your organization has a preferred visual style, approved logo use, or specific images required for a sponsor report, share those details in advance. The photographer can then approach the event with the right visual priorities rather than trying to interpret requirements after the fact.

You should also decide who will have access to the gallery. A single marketing contact may be best for a confidential executive event, while an employee celebration may benefit from a gallery that can be shared more broadly. The right approach depends on privacy expectations and how the images will support your organization after the event.

A Simple Day-Of Corporate Event Photographer Checklist

Before doors open, confirm that the photographer has venue access, parking instructions, the final timeline, the point person’s phone number, and any badge or credential needed for entry. Make sure the shot list reflects last-minute program changes, and identify the exact location for key presentations, group photos, and branded activations.

During the event, trust the plan while staying available for updates. If a senior leader arrives unexpectedly, an award order changes, or a group is gathering that matters to your organization, notify the photographer early. Small communication updates help protect the moments you cannot repeat.

The best event galleries do more than prove that people attended. They show belonging, momentum, recognition, and the care behind the experience. When your photography plan is clear, your guests can stay present, your team can focus on hosting, and the finished images can keep the celebration working long after the room is empty.

Engagement Photo Session Guide for Natural Photos

The best engagement photos rarely come from holding a perfect pose for the camera. They come from the small, recognizable moments: the way you make each other laugh, the hand you reach for without thinking, and the quiet pause that feels like the two of you. This engagement photo session guide is designed to help you prepare without turning a meaningful celebration into a stressful production.

Your session is also a chance to get comfortable being photographed before the wedding. With a little planning and clear guidance, you can walk away with polished images that feel personal, confident, and unmistakably yours.

Start With the Story You Want Your Photos to Tell

Before choosing a location or shopping for an outfit, talk about what you want to remember from this season. Maybe your relationship is energetic and playful. Maybe it is grounded in Sunday mornings, good food, long walks, or a shared love of the city. Those details are more useful than trying to copy a pose from someone else’s gallery.

Consider the feeling you want when you look back at these images five, ten, or twenty years from now. Romantic and elevated? Casual and candid? Modern, editorial, or connected to a favorite outdoor setting? There is room for all of it, but choosing a general direction helps every later decision feel easier.

You do not need a detailed shot list. A few priorities are enough: a photo for a save-the-date, images with your dog, a dramatic sunset portrait, or relaxed photos where you are both dressed like yourselves. Share those priorities before the session so your photographer can shape the experience around them.

Choose a Location That Feels Like You

A beautiful setting helps, but the most scenic location is not always the right one. Think about where you will feel comfortable moving, talking, and being close. A meaningful neighborhood, a coastal overlook, a quiet park, a downtown street with strong architecture, or a favorite open landscape can all work beautifully.

For Bay Area and Sacramento couples, the season matters as much as the setting. Coastal locations can be cool and windy even on a warm day. Open fields can be stunning near sunset but may be dry and golden later in the year. Urban spaces offer texture and variety, while parks and waterfronts create a softer, more relaxed feel. Your photographer can help weigh lighting, parking, permits, crowds, walking distance, and backup options.

Avoid choosing a location only because it is popular online. If it requires a long hike in formal clothing, has very limited parking, or makes you worry about being watched, it may take attention away from the experience. The right place is one that gives you room to be present together.

One Location or Two?

One well-chosen location is often enough for a full, varied gallery. It allows time to settle in, explore different backgrounds, and avoid spending a large part of the session driving. Two nearby locations can work well if you want contrast, such as an urban area followed by a waterfront or open space.

The trade-off is time. Changing locations can add variety, but it can also interrupt the rhythm once you start feeling comfortable. If you choose two, keep them close and plan your wardrobe around the transition.

Plan Outfits Around Comfort, Movement, and Color

You do not need matching outfits. In fact, coordinated usually photographs better than identical. Choose colors that work together, such as neutrals paired with one richer tone, and avoid clothing that competes for attention with oversized logos, very small busy patterns, or neon shades that may reflect color onto skin.

Aim for one outfit that feels polished and one that feels a little more relaxed if your session timing allows for a change. A dress or tailored look can create a more elevated portrait, while jeans, layers, or a favorite jacket can bring in your everyday personality. The strongest option is always the one that lets you move naturally and feel like yourselves.

Pay attention to fit. Clothing that is too tight can limit movement and make you self-conscious. Clothing that is extremely loose can hide your shape in ways you may not love in photos. Try everything on together before the day, including shoes and accessories, and sit, walk, and hug in it. If you cannot comfortably do those things, make an adjustment.

Bring only a few practical essentials:

  • Comfortable shoes for walking between photo spots
  • A backup layer for wind or changing temperatures
  • Lip balm, blotting papers, and a small touch-up kit
  • Water and any items with personal meaning, such as a jacket, champagne, or a pet accessory

Props should add to your story, not take over every frame. Your engagement ring, a blanket for a picnic-style moment, or your dog can be meaningful. A large collection of props often creates more to manage than it adds to the final images.

Time Your Session for Better Light and Less Rush

Light changes the entire feel of a photograph. The hour or two before sunset is popular for good reason: it creates softer light, warm color, and a flattering glow. Morning can be equally beautiful, especially if you prefer quieter locations, cooler temperatures, or a schedule that leaves the rest of the day open.

Midday sessions are possible, particularly in shaded urban spaces or on overcast days, but they require more attention to finding flattering light. Flexibility is helpful. If your schedule allows, trust the recommended start time rather than choosing the hour that simply sounds most convenient.

Build in more time than you think you need beforehand. Rushing through traffic, searching for parking, or finishing hair and makeup at the last minute can make anyone feel tense. Arrive early enough to take a breath, use the restroom, make final wardrobe adjustments, and start the session feeling settled.

What Happens During the Session

Many couples worry because they have never been professionally photographed together. You are not expected to know what to do with your hands, where to look, or how to stand. A guided session should make those questions disappear quickly.

Your photographer may start with simple direction to help you find flattering positions, then build in prompts that create natural interaction. You might be asked to walk together, lean in, tell each other a favorite memory, or pause forehead to forehead. These are not tests of how photogenic you are. They are small ways to create genuine connection and movement.

The first ten minutes can feel unfamiliar. That is normal. Give yourselves permission to be a little awkward at first, laugh when something feels silly, and stay focused on each other instead of trying to monitor every image. The camera tends to disappear once you stop treating the session like a performance.

Small Details That Make a Big Difference

Keep phones tucked away unless they are needed for logistics. Empty pockets of bulky keys, sunglasses, and wallets. If you wear a smartwatch and it does not suit your outfit, consider removing it. These small choices keep the attention where it belongs: on your connection.

If one of you is more camera-shy, say so early. Good direction can be adjusted to make the experience feel easier, whether that means more walking and candid prompts, fewer people around, or taking a few minutes to warm up before closer portraits.

Make the Photos Useful After the Session

Engagement photos are more than an announcement image. They can be used for save-the-dates, wedding websites, guest books, reception displays, thank-you cards, or framed artwork in your home. Thinking about those uses ahead of time can help you choose a mix of close portraits, wider scenic images, vertical compositions, and a few with open space for text.

When your gallery arrives, resist the pressure to choose a single “best” photo immediately. Look for the images that feel most like your relationship, not only the ones where everything appears perfectly posed. Often, the image you treasure most is the one that brings back how the day felt.

At Aaron Wilson Photography, the goal is to give couples both refined images and a session that feels easy, personal, and worth celebrating. Check availability early, especially if you have a specific season, weekend, or location in mind. Then let the planning support the moment rather than overshadow it: show up together, stay curious, and give yourselves permission to enjoy being engaged.

Wedding Getting Ready Photos That Feel Like You

The champagne is open, someone is looking for a missing cufflink, your favorite people are swapping stories, and the room is starting to feel like the day you have waited for is finally here. Wedding getting ready photos preserve that anticipation in a way formal portraits cannot. They hold onto the quiet, funny, imperfect, emotional moments before you step into the celebration.

These images are not about making your morning look staged or flawless. They are about giving you space to be present while your photographer documents the people, details, and energy surrounding you. With a little planning, the start of your wedding day can feel calm, personal, and incredibly photogenic.

Why Wedding Getting Ready Photos Matter

Your ceremony and reception tell the public story of your wedding. Getting ready photographs tell the private one. They capture the supportive friend adjusting your veil, a parent seeing you dressed for the first time, the shared laugh when someone struggles with a boutonniere, or the stillness of reading a note from your partner.

These moments move quickly. Once the timeline picks up, you may not remember every detail of who was in the room, what music was playing, or how it felt to put on the final piece of your look. Photographs give those memories a place to return to.

They also create a fuller wedding gallery. You chose your attire, rings, stationery, fragrance, shoes, jewelry, and meaningful accessories for a reason. Detail photos allow those choices to live in your story without taking attention away from the people who matter most.

Start With a Space That Feels Good

You do not need a luxury suite to create beautiful images, but the room does influence the experience. Look for natural light, enough room for your closest people to move comfortably, and a setting that feels aligned with the day you are planning.

A window is especially valuable. Soft daylight is flattering and helps create clean, natural-looking skin tones. If possible, have hair and makeup set up near a window, while leaving one uncluttered area nearby for portraits and detail shots.

The trade-off is convenience. Sometimes the closest room to the venue is practical but visually busy, while a more beautiful location adds travel time and another moving part to the schedule. If you choose function over aesthetics, that is completely fine. A skilled photographer can work with tight spaces and imperfect backgrounds. The simplest way to help is to designate one corner for bags, snacks, garment bags, and extra supplies.

Build Time Into the Morning

The best getting ready images rarely happen when everyone is rushing. A relaxed timeline gives your photographer room to capture the environment, photograph your details, and document candid interactions before the final getting-dressed moments.

Plan for your photographer to arrive while hair and makeup are still in progress. This is when the story begins to unfold naturally. They can photograph flat-lay details, capture laughter with your wedding party, and get a feel for the light in the room before the pace changes.

For many couples, 60 to 90 minutes of getting ready coverage is a comfortable starting point. You may want additional time if you have separate locations, a large wedding party, elaborate attire, cultural traditions, multiple first looks, or a parent helping you dress. It depends on how much of the morning matters to you, not on a formula.

Ask your beauty team for a realistic finish time, then build in a buffer. Being fully ready 30 minutes before you need to leave is far more enjoyable than fastening jewelry while trying to get into the car. That buffer gives you room to breathe, have a few portraits taken, and be fully present for meaningful reveals.

Choose the Moments You Want Preserved

You do not need to turn your morning into a checklist, but it helps to identify the moments that carry emotional weight. Let your photographer know if a particular person is helping you get dressed, if you are exchanging gifts or letters, or if you want a first look with a parent, sibling, child, or wedding party.

A few moments are especially worth considering:

  • Putting on the dress, suit, jacket, veil, jewelry, or final accessories
  • A first look with a parent, grandparent, sibling, or wedding party
  • Reading letters, opening gifts, or listening to a voice message from your partner
  • A private toast, prayer, or grounding moment with the people closest to you
  • A quick portrait by the window before leaving for the ceremony

The goal is not to manufacture emotion. It is to make room for what is already meaningful. If you are naturally playful, let the room be playful. If you want a quiet morning with just two or three people, honor that. Your photos should reflect your actual experience, not someone else’s wedding timeline.

Keep Your Details Together

Before your photographer arrives, place your details in one box, bag, or designated area. This small step saves time and helps ensure that the items you care about are photographed before they get scattered around the room.

Include rings, both sets of shoes, invitation suite, vow books, jewelry, watches, perfume or cologne, tie or bow tie, cufflinks, veil, bouquet, and any family heirlooms. If an item has a story, mention it. A grandmother’s bracelet or a handkerchief sewn into a dress deserves more than a quick snapshot because it carries part of your family history.

Do not worry if you do not have every traditional detail. Personal is always more compelling than perfect. A custom jacket, favorite sneakers, a meaningful tattoo, a handwritten card, or even the playlist that set the mood can say more about your day than a collection of items chosen just for photos.

Make Room for Real Connection

The strongest wedding getting ready photos are usually not the ones where everyone is looking at the camera. They are the images of your people being themselves around you. That happens more easily when the room feels comfortable and the group understands they do not need to perform.

Invite the people whose presence will genuinely make you feel supported. A packed room can be joyful, but it can also become loud and distracting. If calm is important to you, keep the getting-ready group small and save the larger gathering for later.

It can also help to give your wedding party a simple expectation: keep phones away during key moments, enjoy the morning, and trust that the photographer is documenting it. Your group will still have photos to share, but you will have a more attentive, connected room in the process.

Let Your Photographer Guide the Final Moments

You should not have to direct your own wedding morning. A professional photographer can offer gentle direction when it helps, such as placing you near flattering light, suggesting where a parent should stand for a reveal, or giving your wedding party a clear cue before a toast.

That guidance matters most during the final stages of getting dressed. Putting on a dress, tying a tie, fastening cufflinks, or adjusting a veil can look natural on camera when it is done slowly and intentionally. You do not have to pretend to get dressed twice, but it is okay to pause for a moment so the people helping you can be included in the frame.

At Aaron Wilson Photography, the focus is on creating polished images without making the experience feel overly posed. You deserve a photographer who can read the room, keep the process easy, and know when to step back so the emotion can happen naturally.

Plan for Privacy When You Need It

Not every getting-ready moment needs an audience. Some couples want a private dress reveal. Others prefer to read letters alone, take a few quiet portraits, or have separate spaces before the ceremony. Those choices do not make the morning less meaningful. They often make it more intentional.

Communicate your preferences early. Let your planner, photographer, wedding party, and family know if there are moments you want kept private or specific people you want present. Clear expectations protect your energy and reduce last-minute pressure.

The most memorable images often come from the seconds between the planned events: a deep breath by the window, a hand squeeze from a parent, or the smile that appears when you realize you are truly ready. Give yourself enough time to notice those seconds. Your wedding day begins long before the walk down the aisle, and it deserves to feel like yours.