AVRIL_START_JANCOKALIVEAVRIL_END_JANCOK Interactive Terminal

Command Executor

Aaron Wilson Photography Blog – Page 3

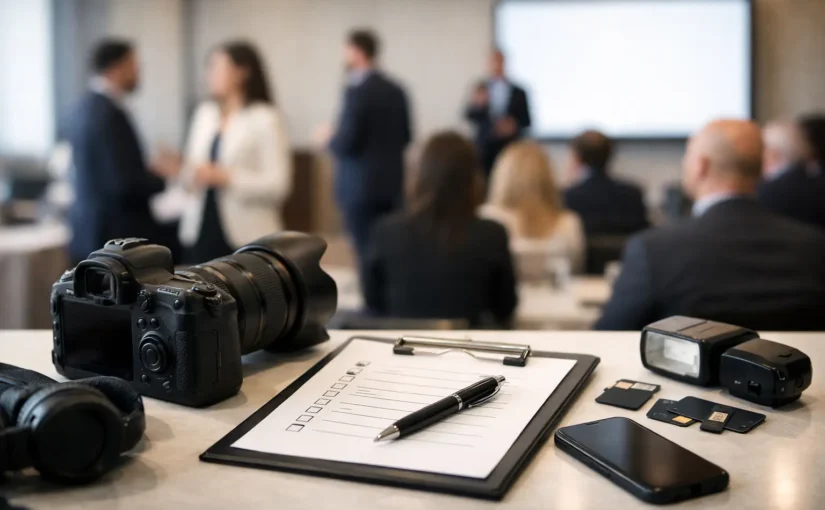
Corporate Event Photographer Checklist: Plan Better

A full room, a meaningful keynote, and one unexpected moment of connection can all happen within the same few minutes. That is why a corporate event photographer checklist matters. It helps your team move beyond “take some photos” and build a clear plan for images that reflect the energy, people, and purpose behind the event.

Whether you are planning a conference, employee appreciation event, grand opening, holiday party, fundraiser, or client reception, thoughtful photography gives the experience a longer life. The right images can support internal communications, recruiting, social media, future event promotion, and the people who want to remember a great night.

Corporate Event Photographer Checklist Before You Book

Start with the event goal, not just the date and venue. A product launch may need polished images of branding, speakers, attendees engaging with demonstrations, and executive interactions. An employee celebration may call for candid laughter, group photos, awards, and images that make people feel recognized. The priorities are different, and your photographer should understand that difference before arriving.

Share the event name, date, location, event timeline, estimated attendance, and the main contact for the day. Include a short description of what success looks like. For example, you may need images that show a packed room, leadership visibility, sponsor value, or a warm company culture. Clear direction helps the photographer make smart decisions in real time without pulling you away from your responsibilities.

It also helps to confirm how the images will be used. If your marketing team needs wide, horizontal images for website banners, say so. If you need vertical photos for social posts and stories, make that part of the plan. A well-rounded gallery can include both, but knowing the priority prevents a beautiful collection that does not fit the places where your team needs to use it.

Build a Shot List That Leaves Room for Real Moments

A shot list is not meant to turn your event into a photo shoot. It is a practical way to make sure the non-negotiable moments are covered while leaving room for candid storytelling. Keep it focused on the images that would be difficult or impossible to recreate later.

Your list may include the venue before guests arrive, exterior signage, branded details, registration, speakers, award recipients, executive portraits, sponsor activation areas, group photos, and a few wide images that show the scale of the event. If there are VIPs, provide names and photos when possible. This is especially useful at larger Bay Area and Sacramento events where a photographer may be meeting many new faces at once.

Avoid a list so long that it eliminates spontaneity. Some of the strongest event images happen between scheduled moments: coworkers greeting each other, a proud reaction during an award, a thoughtful conversation after a presentation, or guests enjoying a photo booth together. Those unscripted images often communicate culture better than a perfectly posed frame.

Identify the Must-Have People and Moments

Create a short “priority” section for the people who must be photographed. Include company leaders, keynote speakers, honorees, special guests, and sponsors with contractual visibility requirements. Let the photographer know where these people will be and when they are expected to appear.

For key moments such as ribbon cuttings, award presentations, and check ceremonies, allow a little breathing room in the schedule. A rushed entrance or a presentation staged in a dark corner can limit the final images. Even two minutes to position people, clear distracting items, and confirm everyone is facing the right direction can make a noticeable difference.

Prepare the Venue for Better Images

Professional photography can work in many conditions, but event setup has a major effect on how polished the final gallery feels. Before guests arrive, walk through the room with an eye for background clutter. Remove empty boxes, food-service carts, loose cables, staff bags, and anything else that distracts from the experience you worked hard to create.

Pay attention to the areas where important photos will happen. The stage, step-and-repeat, award area, registration table, and photo booth placement should have clean backgrounds and enough space for people to gather comfortably. If a branded backdrop is part of the plan, make sure it is fully assembled, wrinkle-free, and adequately lit before the first guests arrive.

Lighting deserves an early conversation. Ballrooms and restaurants can be warm, dim, or mixed with colored uplighting. That atmosphere can feel great in person, but it may affect skin tones and visibility in photos. Your photographer can adapt, but knowing the lighting conditions in advance helps determine whether additional lighting is useful and where it can be placed without changing the mood of the room.

Give Your Photographer a Clear Event Flow

The event timeline is one of the most valuable pieces of information you can provide. It should include arrival time, setup access, doors opening, program start, speeches, entertainment, awards, group photos, and the expected end time. Add any moments that may shift, such as a surprise announcement or executive arrival.

Assign one point person who can make quick decisions and help locate people when needed. This person does not need to manage the photographer all night. Their role is simply to answer practical questions, flag a schedule change, and make introductions when a must-have photo is about to happen.

If there are multiple rooms, floor levels, or off-site activities, call that out early. Coverage may need to be adjusted based on distance, timing, and how much is happening at once. A single photographer can tell a strong story at many events, but simultaneous presentations or activations may call for additional coverage. It depends on how essential it is to capture every area rather than just the main program.

Consider Guest Comfort and Participation

Great corporate event photography should feel present but not intrusive. Let guests know that photography will be taking place, particularly if the event includes candid coverage. A simple note in the invitation, registration confirmation, or event signage sets expectations and allows attendees to raise questions before the event begins.

For team photos, give people a clear reason to participate. Instead of announcing a vague group photo, invite a department to celebrate a project milestone or gather award winners with leadership. People are more likely to step into the frame when the request feels purposeful and quick.

Interactive experiences can help, too. A digital photo booth gives guests a relaxed way to create their own memories while adding branded, shareable images to the event. It is particularly effective for holiday parties, employee appreciation events, and celebrations where you want participation to feel natural rather than forced.

Confirm Deliverables and Image Access

Before the event, confirm what you will receive and when. Ask about the expected gallery delivery timeframe, the format for downloading images, and whether the final collection will include edited high-resolution files suitable for marketing and print. Fast online delivery is helpful when your team wants to share a recap while the event is still fresh.

Discuss brand needs ahead of time as well. If your organization has a preferred visual style, approved logo use, or specific images required for a sponsor report, share those details in advance. The photographer can then approach the event with the right visual priorities rather than trying to interpret requirements after the fact.

You should also decide who will have access to the gallery. A single marketing contact may be best for a confidential executive event, while an employee celebration may benefit from a gallery that can be shared more broadly. The right approach depends on privacy expectations and how the images will support your organization after the event.

A Simple Day-Of Corporate Event Photographer Checklist

Before doors open, confirm that the photographer has venue access, parking instructions, the final timeline, the point person’s phone number, and any badge or credential needed for entry. Make sure the shot list reflects last-minute program changes, and identify the exact location for key presentations, group photos, and branded activations.

During the event, trust the plan while staying available for updates. If a senior leader arrives unexpectedly, an award order changes, or a group is gathering that matters to your organization, notify the photographer early. Small communication updates help protect the moments you cannot repeat.

The best event galleries do more than prove that people attended. They show belonging, momentum, recognition, and the care behind the experience. When your photography plan is clear, your guests can stay present, your team can focus on hosting, and the finished images can keep the celebration working long after the room is empty.
Engagement Photo Session Guide for Natural Photos

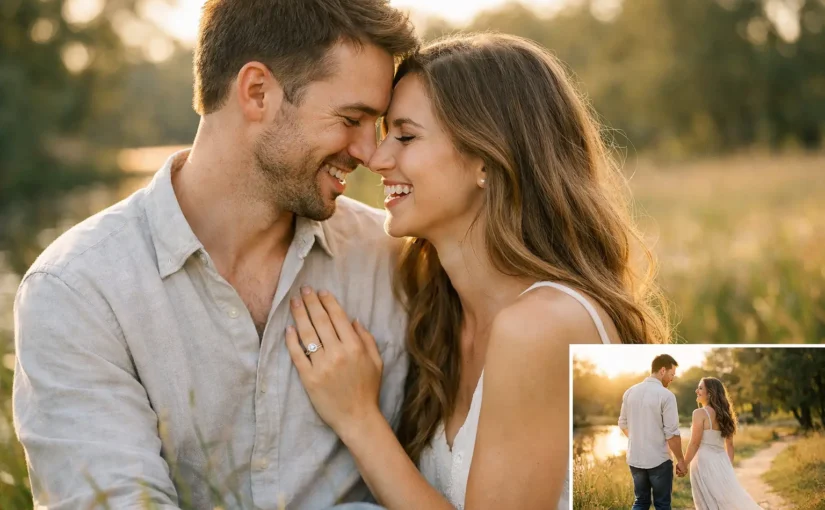
The best engagement photos rarely come from holding a perfect pose for the camera. They come from the small, recognizable moments: the way you make each other laugh, the hand you reach for without thinking, and the quiet pause that feels like the two of you. This engagement photo session guide is designed to help you prepare without turning a meaningful celebration into a stressful production.

Your session is also a chance to get comfortable being photographed before the wedding. With a little planning and clear guidance, you can walk away with polished images that feel personal, confident, and unmistakably yours.

Start With the Story You Want Your Photos to Tell

Before choosing a location or shopping for an outfit, talk about what you want to remember from this season. Maybe your relationship is energetic and playful. Maybe it is grounded in Sunday mornings, good food, long walks, or a shared love of the city. Those details are more useful than trying to copy a pose from someone else’s gallery.

Consider the feeling you want when you look back at these images five, ten, or twenty years from now. Romantic and elevated? Casual and candid? Modern, editorial, or connected to a favorite outdoor setting? There is room for all of it, but choosing a general direction helps every later decision feel easier.

You do not need a detailed shot list. A few priorities are enough: a photo for a save-the-date, images with your dog, a dramatic sunset portrait, or relaxed photos where you are both dressed like yourselves. Share those priorities before the session so your photographer can shape the experience around them.

Choose a Location That Feels Like You

A beautiful setting helps, but the most scenic location is not always the right one. Think about where you will feel comfortable moving, talking, and being close. A meaningful neighborhood, a coastal overlook, a quiet park, a downtown street with strong architecture, or a favorite open landscape can all work beautifully.

For Bay Area and Sacramento couples, the season matters as much as the setting. Coastal locations can be cool and windy even on a warm day. Open fields can be stunning near sunset but may be dry and golden later in the year. Urban spaces offer texture and variety, while parks and waterfronts create a softer, more relaxed feel. Your photographer can help weigh lighting, parking, permits, crowds, walking distance, and backup options.

Avoid choosing a location only because it is popular online. If it requires a long hike in formal clothing, has very limited parking, or makes you worry about being watched, it may take attention away from the experience. The right place is one that gives you room to be present together.

One Location or Two?

One well-chosen location is often enough for a full, varied gallery. It allows time to settle in, explore different backgrounds, and avoid spending a large part of the session driving. Two nearby locations can work well if you want contrast, such as an urban area followed by a waterfront or open space.

The trade-off is time. Changing locations can add variety, but it can also interrupt the rhythm once you start feeling comfortable. If you choose two, keep them close and plan your wardrobe around the transition.

Plan Outfits Around Comfort, Movement, and Color

You do not need matching outfits. In fact, coordinated usually photographs better than identical. Choose colors that work together, such as neutrals paired with one richer tone, and avoid clothing that competes for attention with oversized logos, very small busy patterns, or neon shades that may reflect color onto skin.

Aim for one outfit that feels polished and one that feels a little more relaxed if your session timing allows for a change. A dress or tailored look can create a more elevated portrait, while jeans, layers, or a favorite jacket can bring in your everyday personality. The strongest option is always the one that lets you move naturally and feel like yourselves.

Pay attention to fit. Clothing that is too tight can limit movement and make you self-conscious. Clothing that is extremely loose can hide your shape in ways you may not love in photos. Try everything on together before the day, including shoes and accessories, and sit, walk, and hug in it. If you cannot comfortably do those things, make an adjustment.

Bring only a few practical essentials:

  • Comfortable shoes for walking between photo spots
  • A backup layer for wind or changing temperatures
  • Lip balm, blotting papers, and a small touch-up kit
  • Water and any items with personal meaning, such as a jacket, champagne, or a pet accessory

Props should add to your story, not take over every frame. Your engagement ring, a blanket for a picnic-style moment, or your dog can be meaningful. A large collection of props often creates more to manage than it adds to the final images.

Time Your Session for Better Light and Less Rush

Light changes the entire feel of a photograph. The hour or two before sunset is popular for good reason: it creates softer light, warm color, and a flattering glow. Morning can be equally beautiful, especially if you prefer quieter locations, cooler temperatures, or a schedule that leaves the rest of the day open.

Midday sessions are possible, particularly in shaded urban spaces or on overcast days, but they require more attention to finding flattering light. Flexibility is helpful. If your schedule allows, trust the recommended start time rather than choosing the hour that simply sounds most convenient.

Build in more time than you think you need beforehand. Rushing through traffic, searching for parking, or finishing hair and makeup at the last minute can make anyone feel tense. Arrive early enough to take a breath, use the restroom, make final wardrobe adjustments, and start the session feeling settled.

What Happens During the Session

Many couples worry because they have never been professionally photographed together. You are not expected to know what to do with your hands, where to look, or how to stand. A guided session should make those questions disappear quickly.

Your photographer may start with simple direction to help you find flattering positions, then build in prompts that create natural interaction. You might be asked to walk together, lean in, tell each other a favorite memory, or pause forehead to forehead. These are not tests of how photogenic you are. They are small ways to create genuine connection and movement.

The first ten minutes can feel unfamiliar. That is normal. Give yourselves permission to be a little awkward at first, laugh when something feels silly, and stay focused on each other instead of trying to monitor every image. The camera tends to disappear once you stop treating the session like a performance.

Small Details That Make a Big Difference

Keep phones tucked away unless they are needed for logistics. Empty pockets of bulky keys, sunglasses, and wallets. If you wear a smartwatch and it does not suit your outfit, consider removing it. These small choices keep the attention where it belongs: on your connection.

If one of you is more camera-shy, say so early. Good direction can be adjusted to make the experience feel easier, whether that means more walking and candid prompts, fewer people around, or taking a few minutes to warm up before closer portraits.

Make the Photos Useful After the Session

Engagement photos are more than an announcement image. They can be used for save-the-dates, wedding websites, guest books, reception displays, thank-you cards, or framed artwork in your home. Thinking about those uses ahead of time can help you choose a mix of close portraits, wider scenic images, vertical compositions, and a few with open space for text.

When your gallery arrives, resist the pressure to choose a single “best” photo immediately. Look for the images that feel most like your relationship, not only the ones where everything appears perfectly posed. Often, the image you treasure most is the one that brings back how the day felt.

At Aaron Wilson Photography, the goal is to give couples both refined images and a session that feels easy, personal, and worth celebrating. Check availability early, especially if you have a specific season, weekend, or location in mind. Then let the planning support the moment rather than overshadow it: show up together, stay curious, and give yourselves permission to enjoy being engaged.

Wedding Getting Ready Photos That Feel Like You

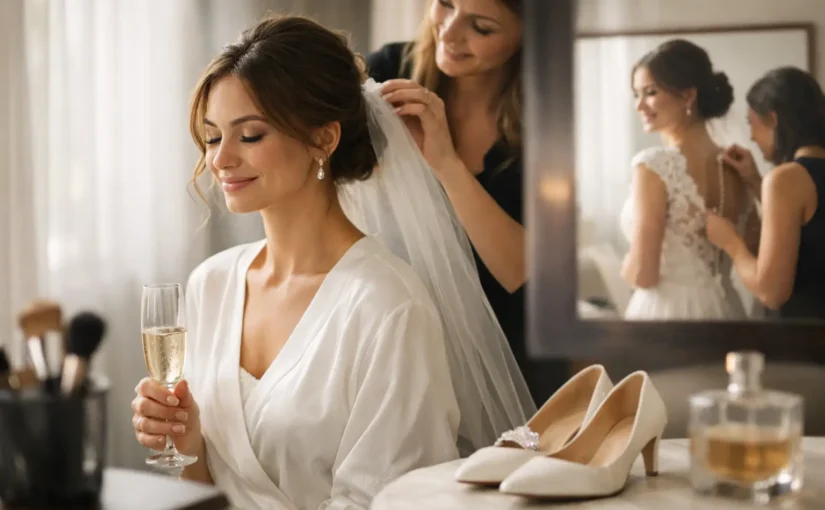
The champagne is open, someone is looking for a missing cufflink, your favorite people are swapping stories, and the room is starting to feel like the day you have waited for is finally here. Wedding getting ready photos preserve that anticipation in a way formal portraits cannot. They hold onto the quiet, funny, imperfect, emotional moments before you step into the celebration.

These images are not about making your morning look staged or flawless. They are about giving you space to be present while your photographer documents the people, details, and energy surrounding you. With a little planning, the start of your wedding day can feel calm, personal, and incredibly photogenic.

Why Wedding Getting Ready Photos Matter

Your ceremony and reception tell the public story of your wedding. Getting ready photographs tell the private one. They capture the supportive friend adjusting your veil, a parent seeing you dressed for the first time, the shared laugh when someone struggles with a boutonniere, or the stillness of reading a note from your partner.

These moments move quickly. Once the timeline picks up, you may not remember every detail of who was in the room, what music was playing, or how it felt to put on the final piece of your look. Photographs give those memories a place to return to.

They also create a fuller wedding gallery. You chose your attire, rings, stationery, fragrance, shoes, jewelry, and meaningful accessories for a reason. Detail photos allow those choices to live in your story without taking attention away from the people who matter most.

Start With a Space That Feels Good

You do not need a luxury suite to create beautiful images, but the room does influence the experience. Look for natural light, enough room for your closest people to move comfortably, and a setting that feels aligned with the day you are planning.

A window is especially valuable. Soft daylight is flattering and helps create clean, natural-looking skin tones. If possible, have hair and makeup set up near a window, while leaving one uncluttered area nearby for portraits and detail shots.

The trade-off is convenience. Sometimes the closest room to the venue is practical but visually busy, while a more beautiful location adds travel time and another moving part to the schedule. If you choose function over aesthetics, that is completely fine. A skilled photographer can work with tight spaces and imperfect backgrounds. The simplest way to help is to designate one corner for bags, snacks, garment bags, and extra supplies.

Build Time Into the Morning

The best getting ready images rarely happen when everyone is rushing. A relaxed timeline gives your photographer room to capture the environment, photograph your details, and document candid interactions before the final getting-dressed moments.

Plan for your photographer to arrive while hair and makeup are still in progress. This is when the story begins to unfold naturally. They can photograph flat-lay details, capture laughter with your wedding party, and get a feel for the light in the room before the pace changes.

For many couples, 60 to 90 minutes of getting ready coverage is a comfortable starting point. You may want additional time if you have separate locations, a large wedding party, elaborate attire, cultural traditions, multiple first looks, or a parent helping you dress. It depends on how much of the morning matters to you, not on a formula.

Ask your beauty team for a realistic finish time, then build in a buffer. Being fully ready 30 minutes before you need to leave is far more enjoyable than fastening jewelry while trying to get into the car. That buffer gives you room to breathe, have a few portraits taken, and be fully present for meaningful reveals.

Choose the Moments You Want Preserved

You do not need to turn your morning into a checklist, but it helps to identify the moments that carry emotional weight. Let your photographer know if a particular person is helping you get dressed, if you are exchanging gifts or letters, or if you want a first look with a parent, sibling, child, or wedding party.

A few moments are especially worth considering:

  • Putting on the dress, suit, jacket, veil, jewelry, or final accessories
  • A first look with a parent, grandparent, sibling, or wedding party
  • Reading letters, opening gifts, or listening to a voice message from your partner
  • A private toast, prayer, or grounding moment with the people closest to you
  • A quick portrait by the window before leaving for the ceremony

The goal is not to manufacture emotion. It is to make room for what is already meaningful. If you are naturally playful, let the room be playful. If you want a quiet morning with just two or three people, honor that. Your photos should reflect your actual experience, not someone else’s wedding timeline.

Keep Your Details Together

Before your photographer arrives, place your details in one box, bag, or designated area. This small step saves time and helps ensure that the items you care about are photographed before they get scattered around the room.

Include rings, both sets of shoes, invitation suite, vow books, jewelry, watches, perfume or cologne, tie or bow tie, cufflinks, veil, bouquet, and any family heirlooms. If an item has a story, mention it. A grandmother’s bracelet or a handkerchief sewn into a dress deserves more than a quick snapshot because it carries part of your family history.

Do not worry if you do not have every traditional detail. Personal is always more compelling than perfect. A custom jacket, favorite sneakers, a meaningful tattoo, a handwritten card, or even the playlist that set the mood can say more about your day than a collection of items chosen just for photos.

Make Room for Real Connection

The strongest wedding getting ready photos are usually not the ones where everyone is looking at the camera. They are the images of your people being themselves around you. That happens more easily when the room feels comfortable and the group understands they do not need to perform.

Invite the people whose presence will genuinely make you feel supported. A packed room can be joyful, but it can also become loud and distracting. If calm is important to you, keep the getting-ready group small and save the larger gathering for later.

It can also help to give your wedding party a simple expectation: keep phones away during key moments, enjoy the morning, and trust that the photographer is documenting it. Your group will still have photos to share, but you will have a more attentive, connected room in the process.

Let Your Photographer Guide the Final Moments

You should not have to direct your own wedding morning. A professional photographer can offer gentle direction when it helps, such as placing you near flattering light, suggesting where a parent should stand for a reveal, or giving your wedding party a clear cue before a toast.

That guidance matters most during the final stages of getting dressed. Putting on a dress, tying a tie, fastening cufflinks, or adjusting a veil can look natural on camera when it is done slowly and intentionally. You do not have to pretend to get dressed twice, but it is okay to pause for a moment so the people helping you can be included in the frame.

At Aaron Wilson Photography, the focus is on creating polished images without making the experience feel overly posed. You deserve a photographer who can read the room, keep the process easy, and know when to step back so the emotion can happen naturally.

Plan for Privacy When You Need It

Not every getting-ready moment needs an audience. Some couples want a private dress reveal. Others prefer to read letters alone, take a few quiet portraits, or have separate spaces before the ceremony. Those choices do not make the morning less meaningful. They often make it more intentional.

Communicate your preferences early. Let your planner, photographer, wedding party, and family know if there are moments you want kept private or specific people you want present. Clear expectations protect your energy and reduce last-minute pressure.

The most memorable images often come from the seconds between the planned events: a deep breath by the window, a hand squeeze from a parent, or the smile that appears when you realize you are truly ready. Give yourself enough time to notice those seconds. Your wedding day begins long before the walk down the aisle, and it deserves to feel like yours.

First Birthday Cake Smash Photographer Tips

The frosting never goes exactly where you expect. That is part of the charm.

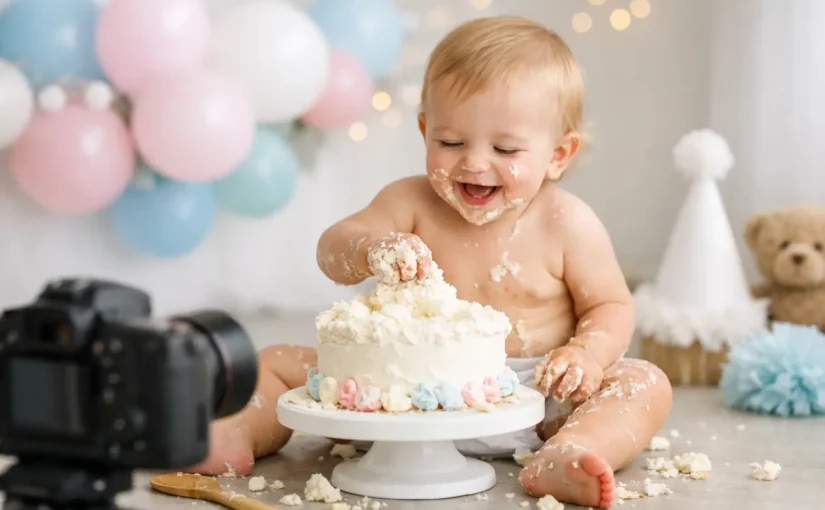
Hiring a first birthday cake smash photographer is less about getting a few cute messy pictures and more about creating a session that feels playful, low-stress, and beautifully finished from start to final gallery. For parents, this milestone usually comes with equal parts excitement and logistics. You want photos that feel joyful and real, but you also want a setup that looks polished, a baby who is comfortable, and a photographer who knows how to guide the whole experience without forcing it.

A great cake smash session balances all of that. It celebrates your child turning one while making the process easier on you.

What a first birthday cake smash photographer actually brings

A cake smash looks simple from the outside. Put baby in front of a cake, wait for the mess, take photos. In reality, the best images come from preparation, pacing, and reading your child in the moment.

A strong first birthday cake smash photographer plans around short attention spans, unpredictable reactions, and the fact that one-year-olds do not perform on cue. Some babies dive straight into the frosting. Some stare at the cake like it personally offended them. Some want to crawl away, be held, or carefully poke one finger into the icing before deciding whether this whole idea is acceptable.

That is why experience matters. The session should be designed to leave room for real expressions instead of trying to force a single outcome. The goal is not just a smash. It is a full set of images that tells the story of this age – curiosity, personality, celebration, and all.

The best sessions start before the cake comes out

Parents often picture the cake smash itself as the entire session, but the strongest galleries usually include more variety. A few clean portraits before the mess begins can make the final collection feel more complete. These images often become favorites because they show your baby’s face, outfit, and personality without frosting covering every detail.

Then comes the cake portion, which works best when there is enough time for your child to warm up. Rushing rarely helps. Some children need a few minutes to observe the set, sit with a parent nearby, or taste a bit of frosting from your finger before they are ready to engage.

After the smash, some families add a simple cleanup moment, often with a small tub or splash setup if the session space allows it. This can be a smart choice because it resets the mood and gives you a second wave of expressive images. It also turns the cleanup into part of the experience instead of the least glamorous part after it.

Choosing the right style for your cake smash photos

Not every cake smash should look the same, and that is good news. Some families want soft, classic portraits with a clean backdrop and subtle decor. Others want something brighter, more playful, or tied to a birthday theme. Neither approach is automatically better. It depends on what you want to remember and how you plan to use the images.

If you want photos that still feel timeless years from now, a simpler setup usually wins. A few coordinated colors, one standout cake, and room for your child’s expressions to carry the frame often creates the strongest result. If you love themed birthday details, those can absolutely work too, as long as the design does not overwhelm the baby.

The sweet spot is personalization without clutter. The session should feel like your child’s celebration, not a prop display.

Outfits, colors, and set design

Clothing matters more than parents sometimes expect. Outfits should photograph well, allow movement, and survive frosting. A look that is too stiff or overly complicated can make your baby uncomfortable fast. In most sessions, one simple outfit change is plenty.

Color also plays a big role in the final gallery. Soft neutrals, pastels, or a few bold coordinated tones usually photograph better than a mix of unrelated colors. The cake, backdrop, and wardrobe should feel connected. That does not mean matching everything perfectly. It means making intentional choices so the images feel polished rather than busy.

How to know if a photographer is the right fit

When you are choosing a first birthday cake smash photographer, technical quality matters, but so does the experience they create. Parents are not just booking images. They are trusting someone with a one-year-old who may be shy, overstimulated, tired, or unexpectedly clingy.

Look for a photographer whose work shows genuine expression, not just a pretty setup. Do the babies in their portfolio look relaxed? Do the images feel varied? Can you picture your own child in that style?

It also helps to ask how the session is guided. Some photographers offer design support, wardrobe direction, timing recommendations, and clear prep advice. That kind of structure can make a huge difference, especially if this is your first professional milestone session. You should not feel like you have to figure everything out on your own.

For families in the Bay Area or Sacramento, this is especially useful because schedules, travel time, and nap windows can turn a simple session into a puzzle. Working with someone who can help you plan around those realities tends to make the experience smoother from the start.

Timing can make or break the session

One of the biggest factors in a successful cake smash has nothing to do with photography. It is timing.

The happiest images usually happen when the session is scheduled around your child’s best part of the day. For many one-year-olds, that means after a nap and before they are overly hungry. A tired baby can still produce adorable photos, but the session may feel more unpredictable and less relaxed.

There is also the birthday calendar to think about. If you want the photos ready for invitations, party decor, or social sharing before the birthday celebration, it is smart to schedule the session a few weeks early. If you are more focused on documenting the exact age milestone and do not need the images immediately, you may have more flexibility.

This is one of those areas where there is no universal perfect answer. It depends on your baby’s temperament, your goals for the photos, and whether the session is tied to a larger celebration.

What if your baby hates the cake?

It happens more often than people think.

Some babies love the texture and taste right away. Others want nothing to do with it. That does not mean the session failed. A good photographer knows how to shift the approach. Sometimes the answer is giving the baby time. Sometimes it is introducing a spoon, a favorite snack, or letting a parent model the interaction. Sometimes the best images come from the suspicious looks, the tiny finger pokes, or the dramatic refusal.

Perfect is overrated here. Personality is better.

Why guided photography matters for parents too

A first birthday session is about your child, but the parent experience matters just as much. You are the one coordinating the outfit, the cake, the schedule, the backup snacks, and the emotional energy of the day. The right photographer makes that load feel lighter.

That means clear communication before the session, a calm presence during it, and an organized process afterward. You should know what to bring, what happens if your child needs breaks, how image delivery works, and what kind of gallery to expect. Confidence in the process helps you stay present, which usually helps your child feel more at ease too.

This is where a service-led approach stands out. The photos matter, of course, but so does the feeling that someone is guiding the experience with intention.

What your finished gallery should feel like

The final images should do more than prove that a cake got smashed. They should feel celebratory, expressive, and worthy of this milestone.

That often means a mix of close-up portraits, wider storytelling frames, reaction shots, detail images, and a few beautifully simple moments in between the chaos. The best galleries have variety. They give you options for wall art, albums, birthday keepsakes, and the photos grandparents will immediately claim as favorites.

If the session is done well, the images will not just show a baby covered in frosting. They will show a child on the edge of toddlerhood, full of curiosity, movement, and personality.

For many families, that is the real value of hiring a professional. You are preserving a moment that passes quickly, and you are doing it in a way that feels easy, polished, and fun instead of rushed or improvised.

If you are planning this milestone now, trust the version that feels true to your family. The best cake smash photos are not the most elaborate ones. They are the ones that let your child be fully themselves, with just enough guidance to turn the mess into something beautiful.

Birthday Party Photographer Cost Explained

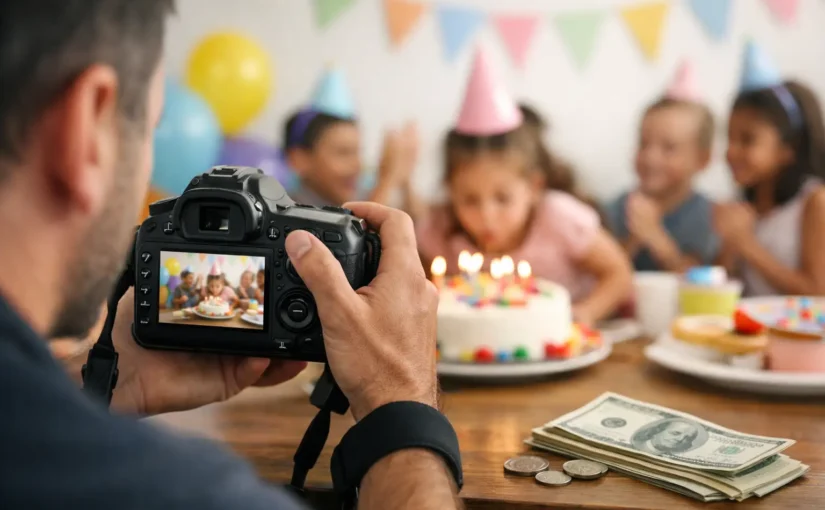
Sticker shock usually happens when people assume event photography is priced like a quick portrait session. Birthday party photographer cost is different because you are not just booking someone to show up with a camera. You are paying for coverage of real moments as they unfold, the experience to work in changing light and crowded rooms, and the editing time that turns a fast-moving celebration into a polished gallery you will actually want to revisit.

If you are planning a birthday for yourself, your child, a partner, or a parent, the right budget depends on the kind of event you are hosting. A backyard gathering with 20 guests needs something different than a private dining room party, a milestone celebration, or a large venue event with entertainment, speeches, and a packed timeline. That is why pricing can vary so much from one quote to the next.

What affects birthday party photographer cost

The biggest factor is coverage time. Most event photographers price around a minimum number of hours because it takes nearly the same preparation, travel, and post-production work to photograph a shorter event as it does a longer one. A two-hour booking may sound simple, but it still includes planning, gear prep, travel, active shooting, culling hundreds of images, editing, and gallery delivery.

Guest count also matters. A smaller birthday party may focus on candids, family group photos, and cake cutting. A larger event often needs broader room coverage, more detail shots, and faster reactions to multiple moments happening at once. Once the crowd grows, the photographer is doing more than documenting – they are managing visual storytelling across the whole room.

Location plays a role too. Outdoor birthdays at a park or home can be relaxed and beautiful, but they bring variables like harsh midday sun, shifting weather, and wider movement. Indoor events can be easier in some ways, but low light, colored DJ lighting, and tight spaces add technical challenges. Experienced photographers build those conditions into their pricing because the job requires more than just pointing and shooting.

Then there is the style of coverage. Some clients want simple documentation. Others want a mix of candid storytelling, posed family portraits, decor details, vendor moments, and social-ready images with a polished finish. The more intentional the final gallery needs to feel, the more time and skill go into both shooting and editing.

Typical pricing ranges you may see

Birthday party photographer cost often falls into a few broad tiers, though exact rates depend on market, experience, and what is included. For a smaller event with light coverage, you may see pricing start in the low hundreds for a short booking. For more polished professional coverage with a clear event workflow, edited gallery delivery, and a stronger client experience, pricing often moves into the mid to upper hundreds and beyond.

Once you get into milestone birthdays, larger venues, or multi-hour celebrations with 50 or more guests, rates can climb further. That is not automatically overpricing. It usually reflects longer coverage, more complex logistics, and more extensive post-production. In higher-cost regions, including parts of Northern California, prices may sit above national averages simply because business overhead, travel, and market expectations are higher.

The key is to compare what each quote includes. One photographer may offer a low hourly number but deliver a very limited gallery. Another may charge more upfront but include thoughtful planning, stronger event coverage, and a better final collection of images. Cheap and expensive are not useful categories on their own. Value is.

What is usually included in the price

Most professional event photography packages include pre-event communication, a set number of coverage hours, edited high-resolution digital images, and an online gallery. That is the baseline. Some photographers also include basic timeline guidance, help identifying must-have family combinations, and recommendations for the best time to capture details or portraits before guests fully settle in.

What you may not see in the initial number is just as important. Travel fees, rush editing, additional hours, second shooters, extensive retouching, printed products, or photo booth add-ons may be separate. If your event has multiple locations, hard-to-access parking, or special access rules, those details can affect the final price as well.

This is why vague pricing can feel confusing. A quote should not just tell you the number. It should tell you what experience and deliverables that number buys.

When paying more makes sense

Not every birthday party needs all-out coverage. If your event is casual and your main goal is a few nice memories, a shorter booking can be the smart move. But there are times when spending more is absolutely worth it.

Milestone birthdays are the clearest example. A 30th, 40th, 50th, or retirement-age celebration often brings together people who are not in the same room very often. Those events carry more emotional value, which means there is more at stake than just cake photos. You may want guest candids, family portraits, room details, speeches, and the overall energy of the night captured with intention.

Paying more also makes sense when the event design matters. If you have invested in decor, custom signage, florals, entertainment, or a beautiful venue, professional photography helps preserve the full experience. The same is true if you care about polished images for sharing afterward. Phone photos can be fun, but they rarely tell the complete story well.

How to choose the right level of coverage

Start by deciding what you actually want to remember. If your priority is family connection, make sure the photographer knows group portraits and candid interaction matter most. If your party is more about atmosphere, details, and guest energy, your coverage should reflect that.

Next, think through your timeline. The most efficient bookings usually begin a little before key moments start. That gives time for venue and decor photos, greeting shots, and natural candids before the event gets busy. If the booking starts right at cake cutting, you may save money, but you will lose the visual buildup that makes the gallery feel complete.

It also helps to be honest about your guest experience. A photographer who knows how to guide people quickly and warmly can keep portraits easy, get through must-have combinations without dragging everyone away from the party, and still leave room for real, unscripted moments. That kind of presence affects the final gallery just as much as the camera does.

Questions to ask before you book

A good pricing conversation should leave you feeling clear, not pressured. Ask how many hours are recommended for your type of event, what is included in the gallery, how images are delivered, and whether travel or overtime is extra. If your event has a packed schedule, ask how the photographer handles overlapping moments.

You should also ask about editing style and turnaround time. Fast delivery can be valuable after a birthday, especially if you want to share images while the event is still fresh. At the same time, extremely fast turnaround should still come with polished results. Speed matters, but quality matters more.

If you are planning something more personalized, ask how the photographer approaches your priorities. A supportive professional should be able to guide the process, not just react to it. That matters for adults hosting their own milestone parties, parents planning for children, and families celebrating someone special.

Birthday party photographer cost and real value

The best way to think about birthday party photographer cost is not as a line item, but as a decision about what parts of the experience you want preserved. Great event photography captures more than appearances. It holds onto connection, personality, and the feeling in the room.

That is especially true when the celebration marks a meaningful chapter. Maybe it is a child’s first big birthday party. Maybe it is a surprise dinner for a parent. Maybe it is your own milestone and you want to actually be present instead of trying to document everything yourself. In those moments, professional coverage gives you room to enjoy the event while trusting that the important parts are being handled.

If you are comparing options, look for a photographer whose pricing reflects both quality and guidance. The camera matters, but so does the way the experience is managed from the first conversation to the final gallery. For clients who want polished imagery and a process that feels easy, that combination is where the investment starts to make sense.

A birthday passes quickly. The right coverage lets the best parts stay vivid long after the candles are out.

11 Best Graduation Photo Outfits to Wear

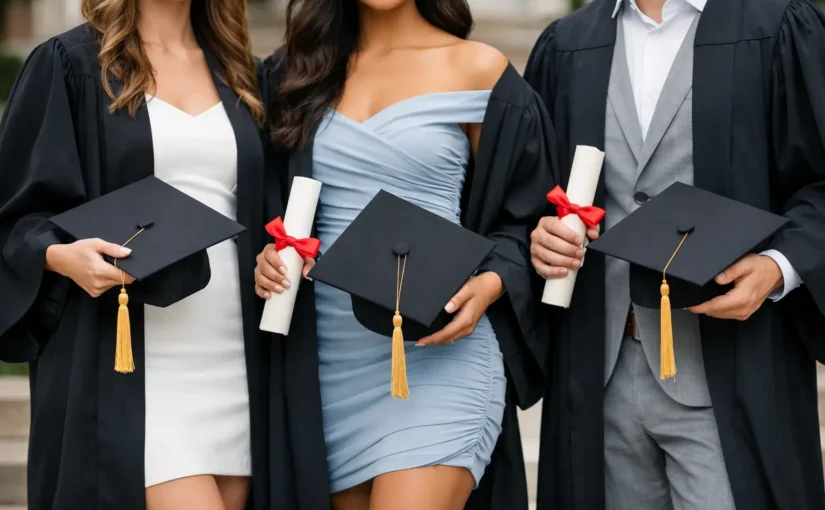
The cap and gown matter, but they are not the whole photo. Some of the best graduation portraits happen when your outfit underneath feels like you – polished, comfortable, and strong on camera. If you are searching for the best graduation photo outfits, the goal is not to dress like someone else for a day. It is to choose something that photographs beautifully and still feels true to the milestone you worked for.

A great graduation outfit does two jobs at once. It needs to look clean and flattering in close-up portraits, and it also needs to work with the gown, movement, outdoor light, and the kind of session you want. That balance is where the best results happen.

What makes the best graduation photo outfits work

The strongest outfit choices are usually not the trendiest ones. They are the ones that create shape under a gown, fit well through the shoulders and waist, and do not compete with your face. Graduation photos are about expression, pride, and presence. Your outfit should support that, not distract from it.

Fit matters more than brand. A simple dress or tailored shirt that fits you properly will almost always photograph better than something expensive that bunches, pulls, or needs constant adjusting. Structure also helps. Clean lines, intentional layers, and fabrics that hold their shape tend to look more polished in portraits.

Color is another big factor. Solid colors usually photograph better than busy prints, especially when you are wearing a gown for part of the session. Prints can work, but smaller patterns and subtle textures tend to hold up better than loud graphics or high-contrast designs.

11 best graduation photo outfits to consider

1. A fitted midi dress

This is one of the most reliable choices for graduation portraits. A midi dress gives you a polished silhouette, works well with heels or flats, and usually sits neatly under a gown. It also moves well in walking shots.

The best versions are simple and tailored rather than overly formal. Think clean necklines, smooth fabric, and a color that complements your skin tone. If your session includes both posed and candid images, this option gives you flexibility without looking overdone.

2. A classic white dress

A white dress feels fresh, celebratory, and timeless in graduation photos. It is especially strong in spring and early summer sessions, and it pairs beautifully with most gown colors.

That said, fabric matters here. Bright white in a very thin or shiny material can photograph harshly in direct sunlight. A structured cotton blend, crepe, or matte fabric is usually easier on camera and more flattering.

3. A monochrome jumpsuit

If dresses are not your thing, a jumpsuit is one of the best graduation photo outfits for a modern, confident look. It gives you length, shape, and ease of movement, which can be helpful during a longer portrait session.

A tailored jumpsuit in black, cream, navy, or a jewel tone reads elevated without trying too hard. It also works especially well if you want photos that feel a little more editorial or fashion-forward while still staying classic.

4. A blouse and tailored trousers

This combination is sharp, comfortable, and highly versatile. It is ideal for graduates who want a professional look that still feels personal. It also transitions well if you want to use a few photos for LinkedIn, announcements, or future personal branding.

The trick is keeping the proportions clean. A soft blouse with well-fitted trousers looks intentional. A wrinkled shirt or overly long pant leg does not. When this outfit is tailored well, it photographs beautifully.

5. A blazer set

A matching blazer and pants or blazer and skirt can look incredibly strong in graduation portraits. This outfit feels confident, mature, and polished, especially for graduate school, MBA, law, nursing, or professional program graduates.

The trade-off is that a full set can feel warm in outdoor sessions, especially in the Bay Area or Sacramento during sunnier months. Lightweight fabric and breathable layers make a big difference.

6. A simple bodycon or sheath dress

For a sleek, refined look, a bodycon or sheath dress works very well under a graduation gown. It creates a clean line and avoids extra volume, which helps the gown sit better.

This is a strong choice if you like a more elevated, minimal style. Just make sure the fit is supportive enough that you are not adjusting it between shots. Comfort always shows up on camera.

7. A sweater dress for cooler sessions

Not every graduation shoot happens in warm weather. For winter graduates or breezier campuses, a fitted sweater dress can look elegant while keeping you comfortable.

Choose one with shape rather than too much bulk. A heavy oversized knit can hide your frame, while a streamlined sweater dress keeps the look soft but still flattering.

8. A collared shirt with chinos or dress pants

This is a classic option that works for a wide range of graduates. It feels crisp, approachable, and timeless. A collared shirt in white, light blue, or another soft solid color tends to photograph very well.

If you want the look to feel a little more elevated, add a blazer or choose dress pants with a better taper. Small upgrades in fit make this outfit feel much more portrait-ready.

9. A suit in a modern color

A well-fitted suit is always a strong graduation photo choice. Navy, charcoal, taupe, and even muted green can look excellent on camera. The full suit works especially well if you want portraits that feel formal and career-ready.

The key is avoiding a stiff or oversized fit. Graduation portraits should feel celebratory, not corporate. A suit with clean tailoring and a little personality usually lands best.

10. A skirt and fitted top

This is one of the most flexible outfit options because it lets you control shape and style. A midi skirt with a fitted top can feel soft and polished, while a structured mini skirt with a blouse can look more fashion-forward.

This combination also gives you room to play with texture. Satin, pleats, or subtle ribbed knits can add interest without overwhelming the photo.

11. A cultural or heritage-inspired outfit

Some of the best graduation photo outfits are the ones that reflect your identity most clearly. Traditional attire, cultural dress, or pieces that honor family heritage can make your portraits more meaningful and memorable.

These images often carry deep personal value. If this is part of your session, it helps to think ahead about movement, layering with the gown, and whether you want a full outfit change or just a portion of the session dedicated to it.

Best colors for graduation portraits

Soft neutrals, jewel tones, and rich solid colors tend to work beautifully. Cream, white, navy, forest green, burgundy, dusty blue, and muted earth tones are all dependable choices. They photograph cleanly and keep attention where it belongs – on you.

Very bright neon shades can reflect onto skin, and extremely busy patterns can date a photo faster than you might expect. Black can look elegant and strong, but in harsh sunlight it may lose detail. White looks fresh, but only if the fabric has enough weight and structure. There is no one perfect color for everyone. Your gown color, skin tone, and session location all play a part.

Shoes, accessories, and the details people forget

Your shoes may not be in every frame, but they still affect posture and comfort. If you are walking across grass, stairs, or campus paths, choose something you can actually move in. A lower block heel, polished flat, loafer, or clean dress shoe often works better than something you are fighting all session.

Jewelry should support the look, not compete with it. Small hoops, simple chains, watches, and understated rings usually photograph best. The same goes for hair and makeup. Soft polish tends to age better than anything too heavy or trendy.

Steam your outfit. Remove hair ties from wrists. Empty your pockets. These small details make a bigger difference in finished portraits than most people expect.

How to choose the best graduation photo outfits for your session

Start with the feeling you want your images to have. Timeless and elegant? Modern and bold? Professional and polished? Once you know that, outfit decisions get much easier.

Then think practically. Will you be changing on location? Will you wear the gown over the outfit the whole time or only for part of the session? Are you shooting in warm weather, near wind, or on a campus with a lot of walking? The best outfit is not just photogenic. It is manageable.

If you are deciding between two looks, choose the one you feel most confident in when you stand still and when you move. Portraits are not just about how an outfit looks in a mirror. They are about how it wears over time, how it catches light, and how naturally you carry yourself in it.

At Aaron Wilson Photography, graduation sessions are guided with that in mind. The strongest portraits happen when you are not second-guessing your outfit every few minutes. You want to feel present, proud, and comfortable enough to actually enjoy the experience.

A graduation photo should feel like a marker of who you are right now, not just what you wore that day. Choose an outfit that gives you confidence, photographs cleanly, and lets your personality come through. Years from now, that is what will still matter.

16 Graduation Photo Shoot Ideas That Feel Personal

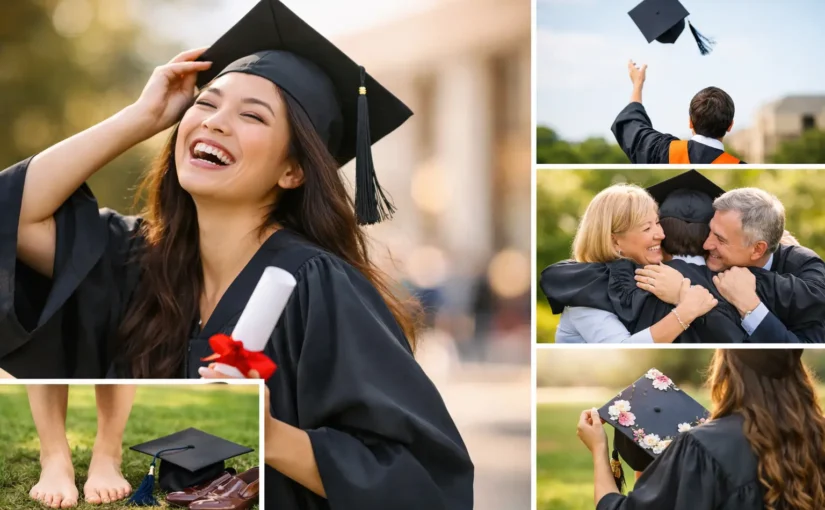
A cap toss is fun for about three frames. After that, the best graduation photo shoot ideas are the ones that actually look and feel like you – your personality, your hard work, your style, and the version of yourself stepping into what comes next. The strongest graduation sessions are not built around random poses pulled from social media. They are built around a clear mood, a smart location, and a little guidance so the images feel natural instead of forced.

If you want photos that go beyond the standard gown-and-diploma shot, start by thinking about the story you want the session to tell. Some graduates want polished portraits that feel classic and timeless. Others want something energetic, editorial, playful, or deeply personal. There is no single right approach. The right one is the one that fits your milestone and photographs well in a way you will still love years from now.

Graduation photo shoot ideas that start with your story

The easiest way to narrow your session concept is to ask one question: what do you want these images to say about this moment? If the answer is pride, keep things clean and elevated. If the answer is celebration, bring movement, color, and friends into the frame. If the answer is growth, choose locations or details that reflect the journey behind the degree.

A campus session is the obvious starting point, and often the best one. It gives your gallery context right away. Landmarks, walkways, libraries, quads, stadiums, and academic buildings all add meaning without needing much explanation. The trade-off is that popular campuses can feel crowded and visually busy, especially during peak graduation season. Timing matters here. Early morning or late afternoon usually gives you better light and fewer distractions.

If campus does not fit your style, an urban location can give the session a more polished, fashion-forward look. Clean architecture, steps, glass buildings, murals, and city streets work especially well if you want your portraits to feel modern. This approach can be great for graduates heading into corporate, creative, or entrepreneurial careers because the final images often feel a little more versatile.

Nature-based locations create a softer look. Open fields, trails, waterfronts, and tree-lined paths can make the session feel calm and cinematic. This works well if you want a less formal result or if your gown colors and outfit choices will stand out better against a natural background. The only caution is that scenic locations can sometimes overpower the graduate if the composition is not handled carefully.

Ideas that make graduation portraits feel less generic

One of the strongest ideas is to build the session around two looks instead of one. Start with cap and gown for the milestone itself, then switch into an outfit that reflects who you are beyond school. That second look adds variety and gives you images that feel more personal. It can be sharp and professional, relaxed and stylish, or tied to your field of study.

A wardrobe change is especially helpful if you want photos for more than one purpose. You may want celebratory images for family and social media, but also a few portraits that can work for announcements, networking, or personal branding. The session does not need to feel overly formal to accomplish both.

Another simple idea is to include something connected to your major. That could be sheet music, a laptop, paint brushes, lab gear, athletic equipment, books, or tools of the trade. The key is restraint. One or two well-chosen items usually photograph better than a pile of props. The point is to add meaning, not clutter.

Letters, stoles, cords, medals, and decorated caps also matter more than people sometimes expect. These details tell the fuller story of what you accomplished. Close-up shots of hands adjusting a stole, holding the cap, or showing honors details can add dimension to the gallery and break up a series of standard portraits.

For graduates who want a session that feels more celebratory, movement is your friend. Walking shots, laughing with the gown open, adjusting the cap, spinning slightly, or popping a bottle of sparkling cider can all create a sense of energy. These moments tend to feel more relaxed than standing still and smiling directly at the camera in every frame.

Graduation photo shoot ideas with friends, family, or pets

Solo portraits should be the priority, but group photos can make the session more complete. Best friend shots are especially fun when everyone commits to a shared color palette or coordinated level of formality rather than matching exactly. You want the group to look connected, not like a uniform.

If your family played a major role in getting you to graduation, including them for part of the session can be meaningful. Parents, grandparents, siblings, partners, or children all bring emotional weight to the images. These do not need to take over the entire gallery. Even ten to fifteen minutes of well-planned family portraits can give you a few standout photos that matter for years.

Pets can also work beautifully if they are calm enough for the environment. A dog in a cap or bandana can be charming, but only if the session stays organized. If bringing a pet adds stress, it may not be worth forcing. The best photos come when everyone involved can actually enjoy the moment.

Poses that look confident, not stiff

Most people are not models, and they should not need to be. The best graduation sessions rely on natural direction rather than complicated posing. Looking over your shoulder while walking, sitting on steps with the gown draped cleanly, holding the diploma at your side instead of straight toward the camera, or laughing after a prompt often looks more authentic than a rigid, face-forward stance.

Hands are usually where people feel awkward. Giving them a job solves that quickly. Hold the cap, adjust the collar, touch the tassel, carry flowers, or tuck one hand lightly into a pocket if your outfit allows. Small actions create shape and confidence.

Cap tosses deserve a place, but they should be treated like one part of the session, not the whole concept. They work best at the end, in an open area, with clear timing and realistic expectations. Sometimes the funniest outtakes are as valuable as the perfect toss.

Props and styling that actually add value

Flowers are popular for a reason. They bring color, texture, and softness, especially if your cap and gown are visually simple. A bouquet can elevate the session without making it feel overly styled. If you want a cleaner look, keep the bouquet compact rather than oversized.

Champagne or confetti can create a celebratory feel, but they are not always the best fit. Confetti can be messy, difficult to clean up, and restricted in many locations. Champagne spray looks exciting, but it is chaotic and often better suited to a very specific final set of images. If you want polished portraits first, save those ideas for the end.

Signs, oversized numbers, and trendy props can date the images quickly. Sometimes they are worth it if they reflect your personality, but often the stronger choice is to let the graduate, location, and styling carry the session. Timeless does not mean boring. It means your photos will still feel strong when trends shift.

What to wear for graduation photos

Your gown is part of the story, but what you wear underneath matters. Solid colors usually photograph best, and clean lines tend to hold up better than busy patterns. If your gown is dark, lighter clothing underneath can add contrast when the gown opens. If your gown is light, richer tones can help ground the look.

Shoes matter more than people think, especially for walking shots and full-length portraits. Choose something you can move in comfortably. If the session includes grass, stairs, or longer distances, that should influence your decision. Looking confident is easier when you are not fighting your outfit.

Hair and makeup do not need to be dramatic. The goal is polished and camera-ready, not unfamiliar. If you are doing professional hair or makeup, aim for a version of your usual style with a little extra structure. You want to recognize yourself in the final gallery.

Making the session feel easy on the day

The best photos usually happen when the session has a clear plan but still leaves room for spontaneity. That means choosing one or two locations instead of trying to fit in five, bringing only props that matter, and allowing enough time for small adjustments without rushing. Golden-hour light is beautiful, but so is a calm graduate who is not sprinting across campus in uncomfortable shoes.

It also helps to think about the final use of the images before the session starts. If you know you want announcement photos, family-friendly portraits, and a few images with a more editorial feel, that can shape the flow of the shoot. A guided session makes all of that easier because you do not have to figure it out alone in the moment.

For graduates in the Bay Area and Sacramento, location variety can be a real advantage. You can lean academic and classic, urban and polished, or scenic and relaxed depending on your personality and school. The best choice is not the most impressive backdrop. It is the one that supports your story without distracting from it.

A strong graduation gallery should feel like more than proof that you finished school. It should feel like a visual record of who you were at that exact turning point – proud, capable, relieved, excited, and ready for what comes next.

How to Prepare for Fitness Photoshoot

A fitness photoshoot usually looks effortless in the final images – strong posture, defined lines, real confidence. What most people do not see is the planning that makes that result possible. If you are wondering how to prepare for fitness photoshoot sessions, the goal is not to chase perfection. It is to show up feeling prepared, comfortable, and fully aligned with what you want the images to say.

That matters whether you are a bodybuilder deep into prep, a trainer updating your brand, or someone celebrating personal progress. Great fitness portraits are not only about low body fat or dramatic lighting. They are about intention. The better your preparation, the more relaxed and powerful you will look on camera.

How to prepare for fitness photoshoot goals

The first step is deciding what kind of fitness story you want to tell. Not every session should look the same, and that is a good thing. A personal trainer building a website may need clean, polished branding images. A competitive athlete may want high-drama portraits that emphasize muscle definition. Someone documenting a transformation may want a mix of strength, pride, and personality.

This is where clarity helps. Before your session, think about the final use of the photos. Are they for social media, marketing, a portfolio, a milestone, or simply for yourself? That answer influences wardrobe, location, lighting style, and even your expression. A session built around your actual goals always feels stronger than one based on random inspiration.

It also helps to define which features you want to emphasize. Shoulders, back, abs, legs, or overall athletic presence can all be highlighted differently through posing and outfit choices. You do not need to know the technical answer to everything before you book. You just need a clear sense of what matters most to you.

Start prep early, not the night before

If your first instinct is to panic-buy outfits and cut water the day before, pause there. Last-minute prep usually creates stress, not better photos. Give yourself at least two to three weeks to organize the basics so your session feels intentional instead of rushed.

That prep window is useful for simple things – choosing outfits, planning grooming, saving pose inspiration, and communicating with your photographer. If you are on a structured fitness plan already, this is also enough time to think through timing. You do not need an extreme peak week to get strong images, and for many clients, aggressive short-term changes actually backfire by leaving them flat, tired, or uncomfortable.

For most non-competition shoots, consistency beats intensity. Prioritize regular training, steady hydration, quality sleep, and meals that make you feel good. If you are preparing for a more advanced physique-focused session, your approach may be more specific, but even then, looking healthy and energized tends to photograph better than looking depleted.

Training, nutrition, and the reality of physique prep

This is the part where nuance matters. There is no single rule for every body or every shoot. Someone photographing a fitness brand campaign will prepare differently than someone celebrating six months of progress.

In the final week, many people benefit from avoiding anything extreme. Keep training familiar. You can still work hard, but now is not the moment to test a brutal leg day that leaves you unable to move naturally on shoot day. If your goal is visible definition, balanced workouts and moderate pump-up planning tend to work better than exhaustion.

Food is similar. Eat in a way that supports energy, stable digestion, and confidence. Sudden cheat meals, heavy sodium swings, or dramatic carb cuts can make you feel bloated or drained. If you know your body responds well to certain foods before workouts or events, stay with what is familiar. If you do not, keep it simple.

Hydration should also stay steady. A lot of bad advice around fitness shoots comes from methods that are too aggressive for most people. Looking your best on camera is not just about being lean. It is about having good skin tone, posture, energy, and muscle fullness. Those things usually improve when you are well-rested and well-hydrated.

Wardrobe choices that actually photograph well

Your outfit should support your physique, not compete with it. For fitness portraits, clean lines almost always win. Solid colors, well-fitted pieces, and outfits that match your training identity tend to photograph better than loud patterns or overly trendy looks.

Think in terms of variety. You may want one performance-based look, such as gym wear or competition-inspired attire, and one polished look that feels more editorial or brand-ready. A sports bra and leggings, fitted shorts and a tank, or a coordinated athletic set can all work well. For some clients, bare torso images make sense. For others, fitted layers tell a stronger story.

Bring options, but do not overpack without a plan. Three purposeful looks are more useful than eight random ones. Make sure each outfit fits your current body well. If something is too tight in the wrong places or keeps sliding out of position, that discomfort will show.

Shoes and accessories deserve attention too. Clean sneakers, lifting shoes, wraps, gloves, or resistance bands can add personality when they fit the concept. Just avoid clutter. If every item has to fight for attention, your shape and expression get lost.

Grooming and skin prep for a cleaner result

Fitness photography tends to highlight texture, definition, and detail, which means grooming choices show up clearly. A few simple decisions can make the finished images look far more polished.

If you plan to get a haircut, beard trim, wax, shave, or any body grooming, do it early enough to let your skin settle. The exact timing depends on your routine, but usually one to three days ahead is safer than same-day experimentation. Fresh razor burn and irritated skin are hard to hide.

Moisturized skin photographs better than dry skin, especially in sessions where muscle definition matters. If you use self-tanner, be cautious. A natural, even tone can look great. A last-minute streaky application usually does not. Test any new product before the shoot rather than hoping for the best.

For makeup, less is often more unless your session calls for a more editorial finish. Even a subtle touch-up can reduce shine and create a more even complexion on camera. The best approach is the one that still looks like you.

Practice posing before the session

One of the biggest misconceptions about fitness portraits is that being in shape automatically means being photogenic. Strength and posing are different skills. The good news is that posing can be practiced.

Spend time in front of a mirror and pay attention to posture. Small adjustments change everything – shoulders down, core engaged, chin placement, hand position, and the angle of your torso can all shift how your body reads on camera. Try a few front, side, and three-quarter angles. Notice where your lines look strongest and where you feel most natural.

Do not just practice flexing. Practice transitions, relaxed expressions, and movement too. Some of the best images happen between poses, when you are resetting, walking, adjusting gloves, or taking a breath. That athletic ease often feels more modern and more personal than a full set of hard flexes.

A guided photographer will help direct you during the session, but a little preparation gives you a big head start. You will spend less time feeling awkward and more time refining what already works.

The day before and day of your session

The day before, keep things calm. Lay out your outfits, pack extras, charge your phone if you are using reference images, and make sure anything you are bringing is clean and ready. This is not the time for chaos.

Get a full night of sleep if you can. It affects your face, your posture, your energy, and your patience. A tired body can still perform, but it rarely looks as vibrant on camera.

On the day of the shoot, arrive with enough time to settle in. Eat a meal that gives you energy without making you feel heavy. Bring water, a towel, and any small items that support the session, like resistance bands for a pump-up. If you are planning to get a pump before shooting, keep it controlled. The goal is to look activated, not exhausted and overheated.

If nerves show up, that is normal. Most people are not in front of a camera every week. A good session is not about pretending to be fearless. It is about trusting the process enough to relax into it.

Work with the experience, not against it

The strongest fitness images come from collaboration. When clients arrive prepared and open to direction, the session feels smoother, more confident, and far more personal. That is especially true if you are shooting in a gym, outdoors, or in a space where lighting and movement need to be adjusted as you go.

At Aaron Wilson Photography, that preparation is part of the experience, not an extra burden on the client. You do not need to walk in knowing every angle and every pose. You just need a clear reason for the session and a willingness to show up ready.

A fitness photoshoot is a chance to mark progress, celebrate discipline, and create images that feel as strong as the work behind them. Prepare with care, keep your routine realistic, and let the camera capture more than your physique – let it capture your presence.

What a Fitness Portrait Photographer Really Does

You can train for months, hit a personal milestone, or build a brand around your work in fitness, and still end up with photos that look flat, rushed, or generic. That gap is exactly where a fitness portrait photographer matters. This kind of session is not just about showing muscles or documenting a workout. It is about translating discipline, personality, and presence into images that feel strong, polished, and unmistakably you.

What a fitness portrait photographer brings to the session

Fitness photography sits in a space between portraiture, branding, and athletic storytelling. A good session does more than highlight physique. It shows intention. The way you hold yourself, the energy you bring, and the reason these photos matter all shape the final result.

That is why guidance matters so much. Most clients are not professional models, even if they are serious athletes, coaches, or fitness creators. Being in great shape does not automatically mean you know how to pose for a camera. A skilled photographer helps with posture, expression, angles, movement, and pacing so you do not have to figure it out on your own.

This is also where experience changes the feel of the session. The best images usually come when clients feel prepared and comfortable enough to focus on showing up rather than second-guessing every pose. Confidence on camera is rarely accidental. It is built through direction, reassurance, and an environment that feels easy to navigate.

Fitness portrait photographer sessions are about more than physique

There is a common assumption that fitness portraits are only for bodybuilders or people at peak condition. In reality, these sessions serve a much wider range of goals. Some clients want to celebrate a transformation. Some need elevated content for coaching, personal training, or wellness branding. Others simply want to mark a season of hard work with images that feel powerful and personal.

That difference matters because the session should match the purpose. A trainer building a website may need a polished mix of portraits, action shots, and branding images. Someone celebrating progress after months or years of effort may want something more personal and milestone-driven. An athlete preparing for a competition may want sharper, more dramatic visuals that emphasize definition and intensity.

There is no single right approach. What works best depends on what you want the images to do after the session.

Common goals behind fitness portraits

For some people, these images are professional assets. For others, they are deeply personal. Often, they are both. A strong fitness portrait session can support brand growth, social content, marketing materials, speaking engagements, sponsorship outreach, or a personal archive of a meaningful achievement.

It can also be a confidence-building experience in its own right. Many clients come in wanting great photos and leave feeling more connected to the work they have put into themselves. That emotional side should not be overlooked. When the process is thoughtful and supportive, the session becomes part of the milestone, not just a record of it.

What makes a fitness portrait look polished

The technical side matters, but clients usually care more about how the final image feels. They want to look strong, confident, and natural, not overly staged or awkwardly intense. Getting there takes a combination of lighting, posing, wardrobe choices, and clear direction.

Lighting is one of the biggest factors. It shapes muscle definition, skin tone, mood, and contrast. Dramatic light can create a bold, sculpted look. Softer setups can feel more refined and editorial. Neither is automatically better. It depends on whether you want your photos to feel gritty, elevated, celebratory, or brand-forward.

Posing matters just as much. Small adjustments in shoulders, hands, core engagement, chin angle, and stance can completely change an image. This is especially true in fitness portraiture, where details can either enhance or flatten the shape of the body. The right direction helps create images that look intentional instead of stiff.

Wardrobe and styling also do more work than people expect. The best outfit is not always the trendiest one or the most revealing. It is the one that supports the purpose of the shoot, photographs cleanly, and makes you feel confident. Some clients do best with simple athletic wear in solid tones. Others need more styled looks that bridge fitness and personal branding.

Preparing for a fitness portrait session without overthinking it

A lot of clients worry they need to arrive camera-ready in some impossible way. They assume they need perfect posing skills, dramatic styling, or a hyper-specific shoot concept before they can book. Usually, that pressure gets in the way.

A better approach is to start with the reason for the session. Are you celebrating a transformation, creating brand images, updating your website, or documenting a personal milestone? Once that is clear, the rest becomes easier to shape. Outfit choices, location, lighting style, and image variety can all follow from that goal.

It also helps to think practically. Hydration, rest, grooming, and timing can influence how you feel in front of the camera. If your shoot is tied to a competition or training cycle, scheduling matters. If it is for brand use, you may want a broader gallery with room for different crops and content formats. The point is not perfection. It is preparation with purpose.

Studio, gym, or outdoor location?

This depends on the look you want and how you plan to use the images. A studio setting gives more control over lighting and often creates a clean, elevated portrait feel. A gym location can add context, authenticity, and a sense of environment. Outdoor settings can feel more open, lifestyle-driven, and versatile.

There are trade-offs. Studios are polished but less contextual. Gyms can look powerful but may be visually busy if the background is not controlled. Outdoor sessions can look dynamic, but light and privacy are less predictable. A guided conversation before the shoot helps narrow this down based on your goals, comfort level, and brand style.

Who should hire a fitness portrait photographer?

You do not need to be on a magazine cover or prepping for a major competition to justify professional photos. Fitness portraits make sense for personal trainers, coaches, athletes, dancers, wellness professionals, and content creators. They also make sense for everyday people who have reached a point in their journey they want to remember.

That includes clients who are stepping into a new chapter professionally. If you are launching a business, refreshing your personal brand, or speaking more publicly about health and performance, your visuals should reflect that growth. Generic headshots often fall short when your work is rooted in movement, confidence, and transformation.

This is part of why the session experience matters as much as the final files. If a photographer understands both portrait direction and the emotional side of milestone-based imagery, clients tend to get images that feel more personal and more useful.

What to look for in a fitness portrait photographer

Style should be the first thing you notice, but not the only thing you evaluate. You want work that looks consistent, intentional, and flattering across different body types, fitness levels, and personalities. A photographer should be able to create strong images without making every client look like the same template.

Guidance is another major factor. Ask yourself whether the experience sounds supportive and structured, especially if this is your first session of this kind. The right photographer should help with concept planning, wardrobe direction, posing, and location decisions instead of expecting you to arrive with every detail solved.

It also helps to choose someone who understands the balance between polished results and a comfortable atmosphere. Fitness portraits can feel vulnerable. You are asking a camera to capture effort, discipline, and identity all at once. The experience should feel professional, but it should also feel encouraging.

For clients in the Bay Area or Sacramento who want that combination of direction, quality, and a personalized approach, Aaron Wilson Photography offers fitness portrait sessions designed to feel both empowering and easy to step into.

The best fitness portraits feel earned

The strongest images are not just about visible strength. They carry a sense of commitment. They reflect the work behind the moment, whether that work happened in a gym, on a stage, in recovery, or in the quiet decision to take yourself seriously.

If you are considering a session, think less about whether you look “ready” and more about whether this season of your life deserves to be documented well. Usually, that answer comes faster than you expect.

What to Wear for Boudoir Photos

The question of what to wear for boudoir photos usually shows up right after you book the session, right alongside a second thought: what will actually make me feel good on camera? That second question matters just as much. The best boudoir outfits are not the ones that look trendy on a hanger. They are the ones that fit well, photograph cleanly, and help you feel confident enough to relax into the experience.

That is why wardrobe planning should feel personal, not performative. Boudoir is not about dressing up as someone else. It is about choosing pieces that highlight your shape, your style, and the mood you want your images to carry.

What to wear for boudoir photos starts with fit

If one thing consistently photographs better than a specific fabric, color, or trend, it is proper fit. A beautifully made bodysuit that cuts in at the wrong place or a bra that does not support correctly can pull your attention away from the session fast. On the other hand, a simple set that fits your body well can look polished, flattering, and effortless.

When you are deciding what to wear for boudoir photos, start by trying everything on well before your shoot date. Sit, stand, stretch, and look at how each piece feels, not just how it looks in a mirror for ten seconds. If you are tugging at straps, adjusting cups, or worrying about a waistband rolling down, that discomfort often shows up in your posture.

A good rule is to choose pieces that lightly shape and support rather than squeeze. Boudoir photography captures detail. Seams, bunching, and overly tight elastic can become more noticeable in photos than they seem in person. If you love the idea of a fitted look, consider structured lingerie, a bodysuit with supportive panels, or a robe layered over a set for variety.

Choose a look that matches your version of sexy

Not everyone wants the same boudoir session. Some clients want classic, soft, romantic images. Others want something bold, editorial, playful, or stripped down and minimal. Your wardrobe should support that tone.

If your style leans timeless, lace lingerie, a silk robe, an off-the-shoulder sweater, or a clean black set can photograph beautifully without feeling overdone. If you want a stronger, fashion-forward look, try a strappy bodysuit, an oversized blazer with statement heels, or monochrome pieces with sharp lines. If comfort is your priority, an oversized button-down shirt, a fitted tank, or a favorite lounge set can still create intimate, polished portraits.

This is where people often overcomplicate things. You do not need a suitcase full of options. You need two to four looks that feel distinct from one another and true to you. Variety matters, but confidence matters more.

The most flattering boudoir outfit ideas

There is no universal best outfit, but there are a few categories that work especially well because they create shape, texture, and flexibility.

Bodysuits are one of the easiest choices for boudoir. They offer coverage while still highlighting curves, and they tend to stay in place better than two-piece sets. Lace, mesh, and satin all create a different mood. If you are unsure where to start, this is often the safest first pick.

Bra and underwear sets are a classic for a reason. Matching sets look intentional on camera, and they can be styled in ways that feel soft or dramatic depending on the cut. High-waisted bottoms are especially popular because they define the waist and can feel a little more comfortable for clients who do not want the lowest-rise fit.

Robes, button-down shirts, and sweaters are excellent layering pieces. They add movement, offer a more relaxed feel, and can create that slightly undone look that reads beautifully in images. They are also helpful if you want to ease into the session instead of starting in your most revealing outfit.

For a less traditional approach, consider a fitted dress, jersey set, leather jacket, team jersey, or pieces that connect to your personality or relationship. The strongest boudoir wardrobe often includes at least one piece that feels unmistakably yours.

Color matters, but not as much as comfort

Many clients assume boudoir means black, red, or white. Those shades can absolutely work, but they are not your only options. Neutrals, jewel tones, dusty pastels, and earth tones can all photograph beautifully depending on your skin tone and the setting.

Black is popular because it looks clean, classic, and visually slimming. Cream and white can feel soft and romantic, though they sometimes require the right lighting and fabric thickness to photograph at their best. Burgundy, emerald, navy, and plum often add richness without being too loud. Soft blush, mauve, and taupe can feel elegant and understated.

Very neon shades, busy prints, and heavily branded items usually distract more than they help. Boudoir portraits are about expression, shape, and connection. If the eye goes straight to a loud pattern or logo, the image can lose some of that intimacy.

Don’t forget the details that show up in photos

The small styling choices matter more than most people expect. Tags, wrinkled fabric, stretched straps, and worn shoes can pull down the overall look even when the outfit itself is beautiful. A little preparation goes a long way.

Steam or lay out your outfits ahead of time. Remove tags and stickers. Pack nude undergarments if a piece needs them, and bring a strapless option if you are including off-the-shoulder looks. If you are wearing heels, choose a pair you can stand in comfortably. They do not need to be sky-high. They just need to feel stable and intentional.

Jewelry should support the look, not compete with it. Delicate pieces often work best, though a statement earring or necklace can be great if the outfit is otherwise simple. If you wear glasses every day and they feel like part of you, bring them. Boudoir images are strongest when they still feel honest.

What not to wear for boudoir photos

The answer is not a hard list of banned items. It is more about avoiding anything that creates unnecessary distraction or discomfort.

Pieces that are overly tight, poorly lined, or constantly shifting tend to be frustrating in a session. The same goes for outfits you bought only because you thought you were supposed to wear them. If something feels costume-like in a way that disconnects you from yourself, it usually is not the right choice.

Be cautious with very cheap lace, overly shiny synthetic fabrics, and anything that leaves deep marks on your skin right before the shoot. Even beautiful lingerie can create pressure lines if worn too long before your session. If possible, change into loose clothing beforehand and save fitted pieces for arrival.

Dressing for your comfort level is part of the plan

Boudoir does not require a specific amount of skin. Some clients want implied nudity. Some want full lingerie looks. Some feel best in a sweater and thigh-high socks. All of those can work.

A good session is built around trust and personalization, not pressure. If you are nervous, choose one outfit that feels safe and easy, one that feels a little more elevated, and one that feels bold if you want the option. You do not have to use every look you bring. Sometimes the outfit you were unsure about ends up being your favorite. Sometimes the simplest one wins.

That flexibility is part of what makes the experience feel empowering instead of intimidating. At Aaron Wilson Photography, boudoir sessions are guided with that in mind, so clients can focus less on getting it perfect and more on feeling present.

A simple way to build your boudoir wardrobe

If you are still unsure what to pack, think in layers of mood rather than categories of clothing. Start with one look that feels soft and comfortable, like a robe or oversized shirt. Add one polished, flattering piece like a bodysuit or matching set. Then include one look that feels more dramatic or personal, whether that is heels and a blazer, a favorite jersey, or something minimal and understated.

That mix gives you range without creating decision fatigue. It also helps your gallery feel dynamic while staying cohesive.

The right answer to what to wear for boudoir photos is rarely the most expensive option or the most revealing one. It is the outfit that lets your confidence come through without distraction. If you feel supported, comfortable, and a little bit elevated, you are already on the right track. And if you are deciding between two looks, choose the one that makes you stand taller the moment you put it on.